Cool people use Stripe to process payments in their apps. Cooler people extend Stripe via webhooks. But only the coolest people extend Stripe with Node.js using Auth0 Webtasks.

If you are integrating payments into your application, chances are you are using Stripe. Stripe makes it easy for developers to accept credit cards and bitcoin with a set of simple HTTP APIs. To support the rich lifecycle of payment transactions, Stripe also uses webhooks to allow your app to process asynchronous events. For example, your webhook can be invoked when a scheduled subscription payment fails.
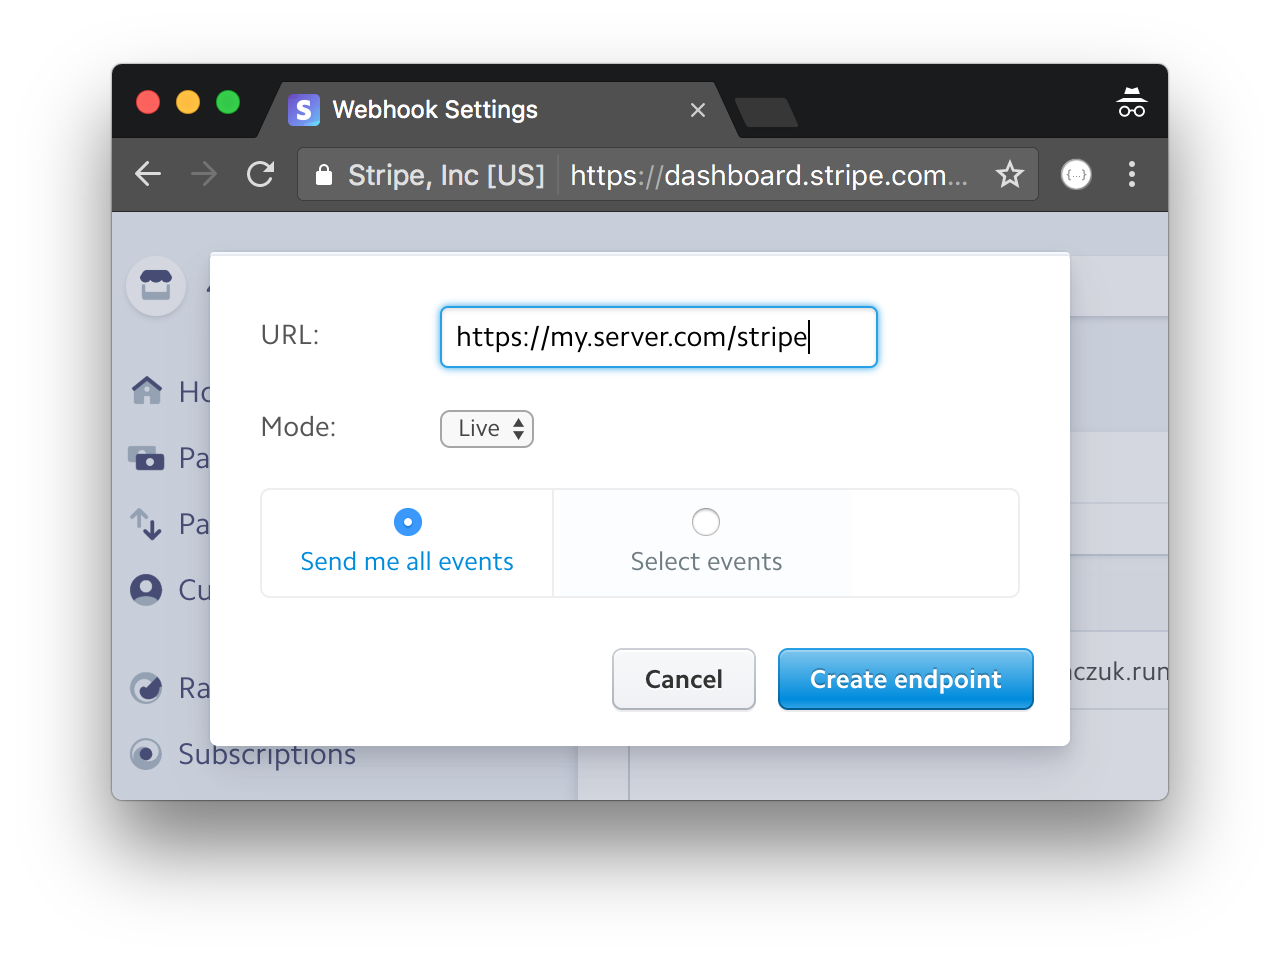
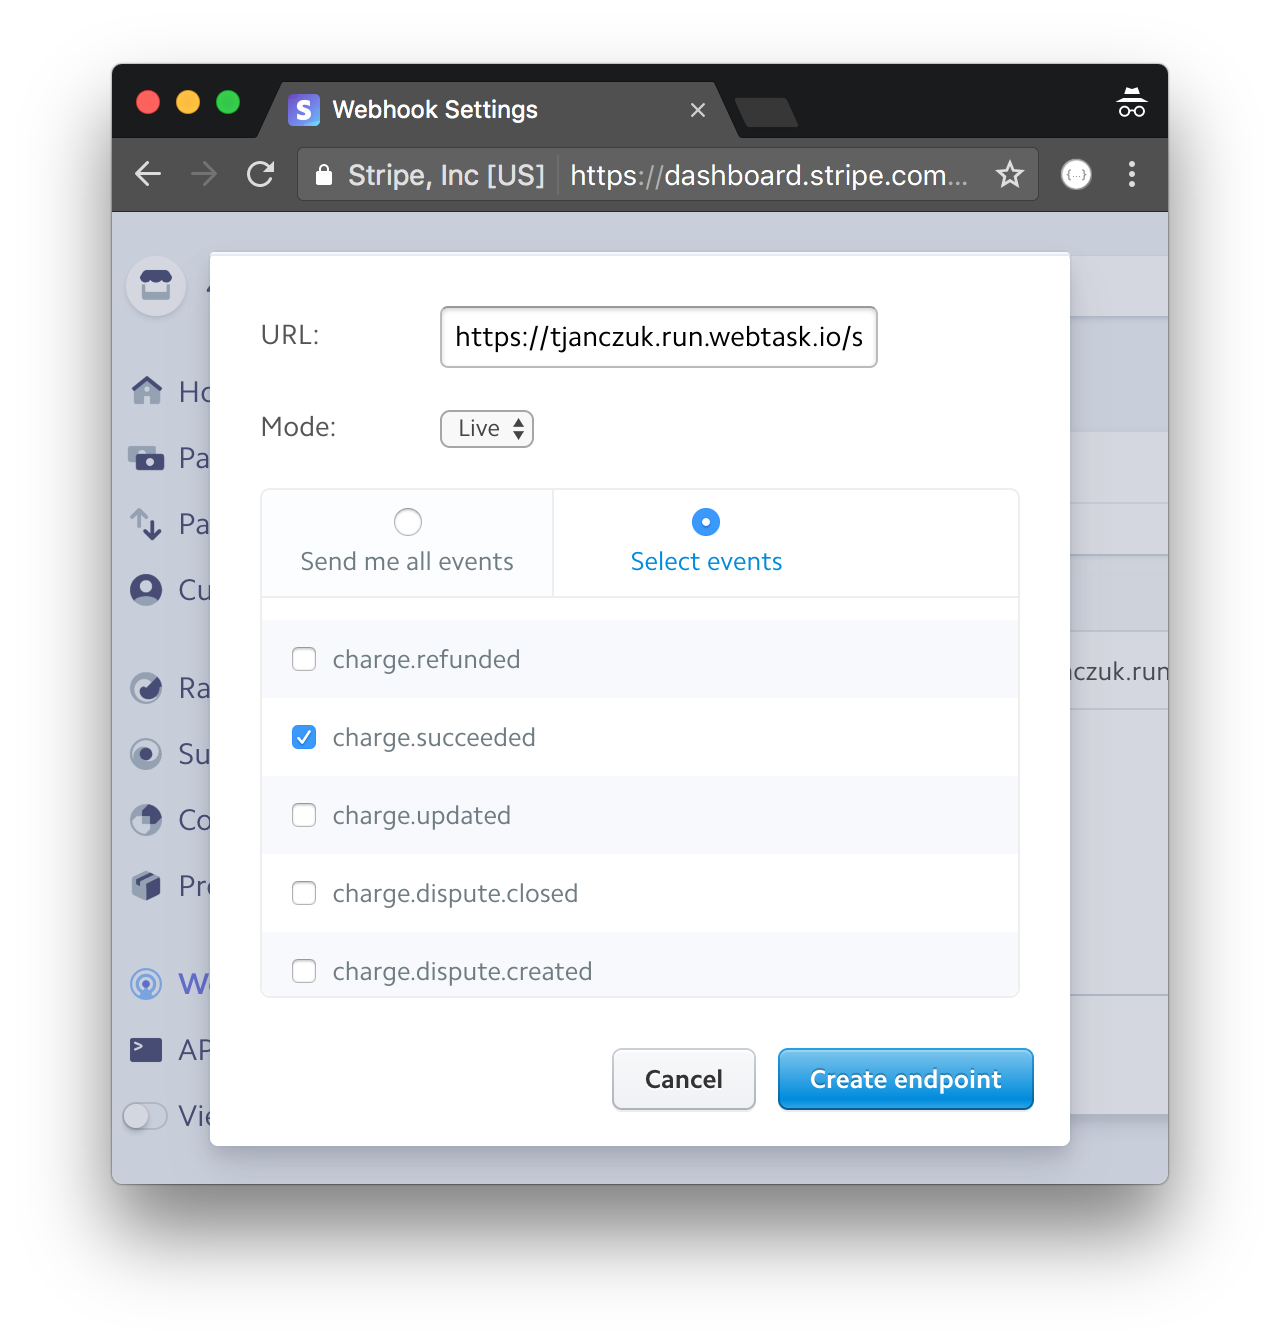
Creating a Stripe webhook is as simple as registering your URL with Stripe and selecting which payment events the webhook should receive.
But then you need to find a place to host it, get an account, deploy the code, monitor health, fret about SSL, etc. In other words, you need to run a proper service.
Or do you? Enter Auth0 Webtasks.

Auth0 Webtasks allow you to turn Node.js code into an HTTP endpoint in seconds. No servers, no hosting, just code.
Check it out yourself at https://webtask.io/make. You can have an endpoint implemented in Node.js working in a matter of seconds. It is a convenient way to create any webhook.
Stripe webhook with Auth0 Webtasks
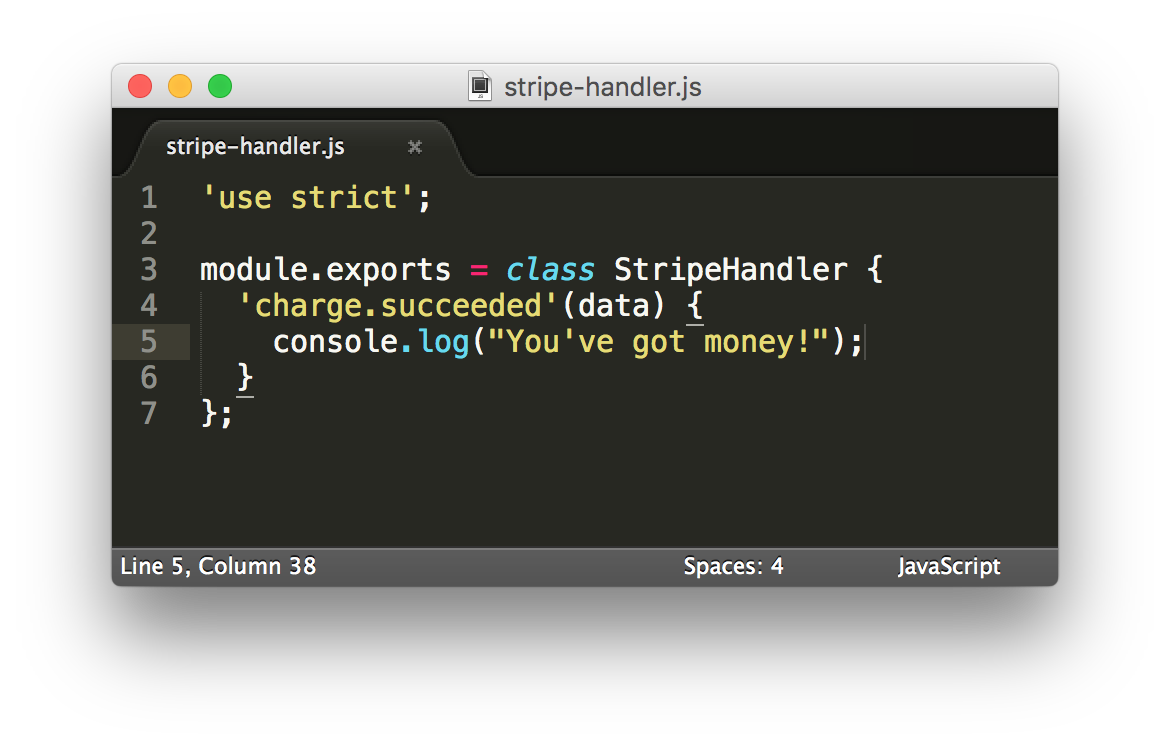
Let’s start by creating a Stripe webhook that receives the charge.succeeded event from Stripe:
Now let’s install and use the wt-cli command line tool to turn this code into an endpoint with Auth0 Webtasks:
sudo npm i -g wt-cli
wt init

wt create stripe-handler.js \
  --meta wt-compiler=https://raw.githubusercontent.com/tjanczuk/wtc/master/stripe_compiler.js
The wt create command will return a URL which you can use directly as a Stripe webhook:
From now on, whenever Stripe raises the charge.succeeded event, your webtask code will be invoked.
Editing the webhook
While creating and editing webtasks with the wt command line tool is certainly cool and professional, even the coolest of us deserve basic creature comforts. In Auth0 Webtasks they come in the form of a first-class, web-based development experience using the Webtask Editor. You can pop into the browser to edit an existing webtask with:
wt edit stripe-handler
This brings up the webtask editor:
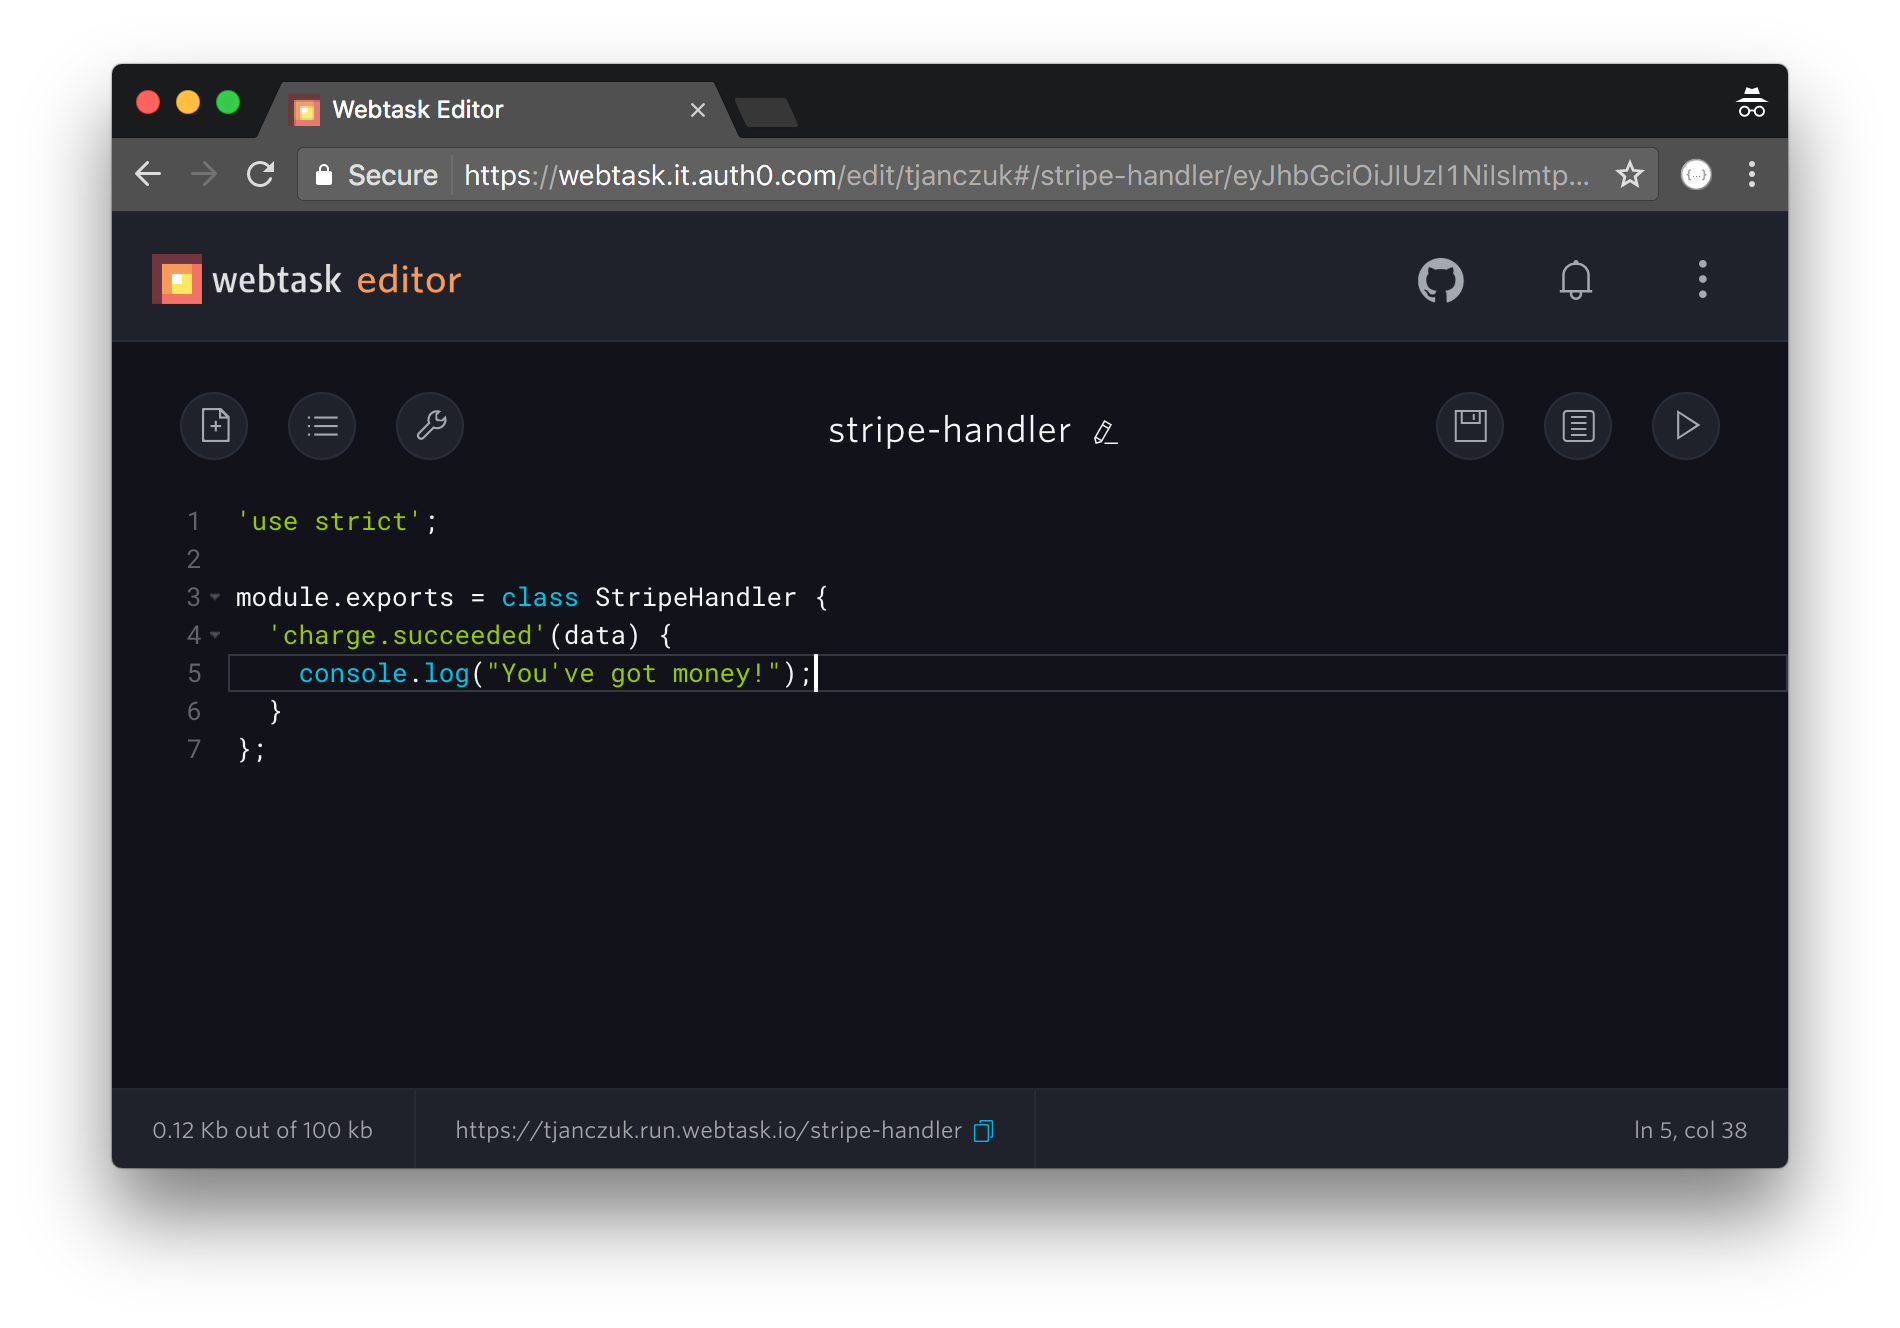
From here you can edit the webtask, configure secret parameters, access real-time logs, and test it using an integrated runner. You can read more about the webtask editor in the documentation.
The rest of this post will showcase using the Webtask Editor, but all operations have their equivalent in the wt command line tool, which you can read about here.
All Stripe events are belong to you
The charge.succeeded is arguably the most rewarding of all events Stipe will ever send to your webhook. But what about others? Certainly something like invoice.payment_failed or charge.dispute.created require decisive action.

Fortunately you can accept any event Stripe will send to your webhook with a simple, convention-based programming model. You need to implement a Node.js module that exports a JavaScript class. Each Stripe event you wish to accept and process must have a corresponding method defined within that class. The method accepts the data parameter which is the event payload sent by Stripe.
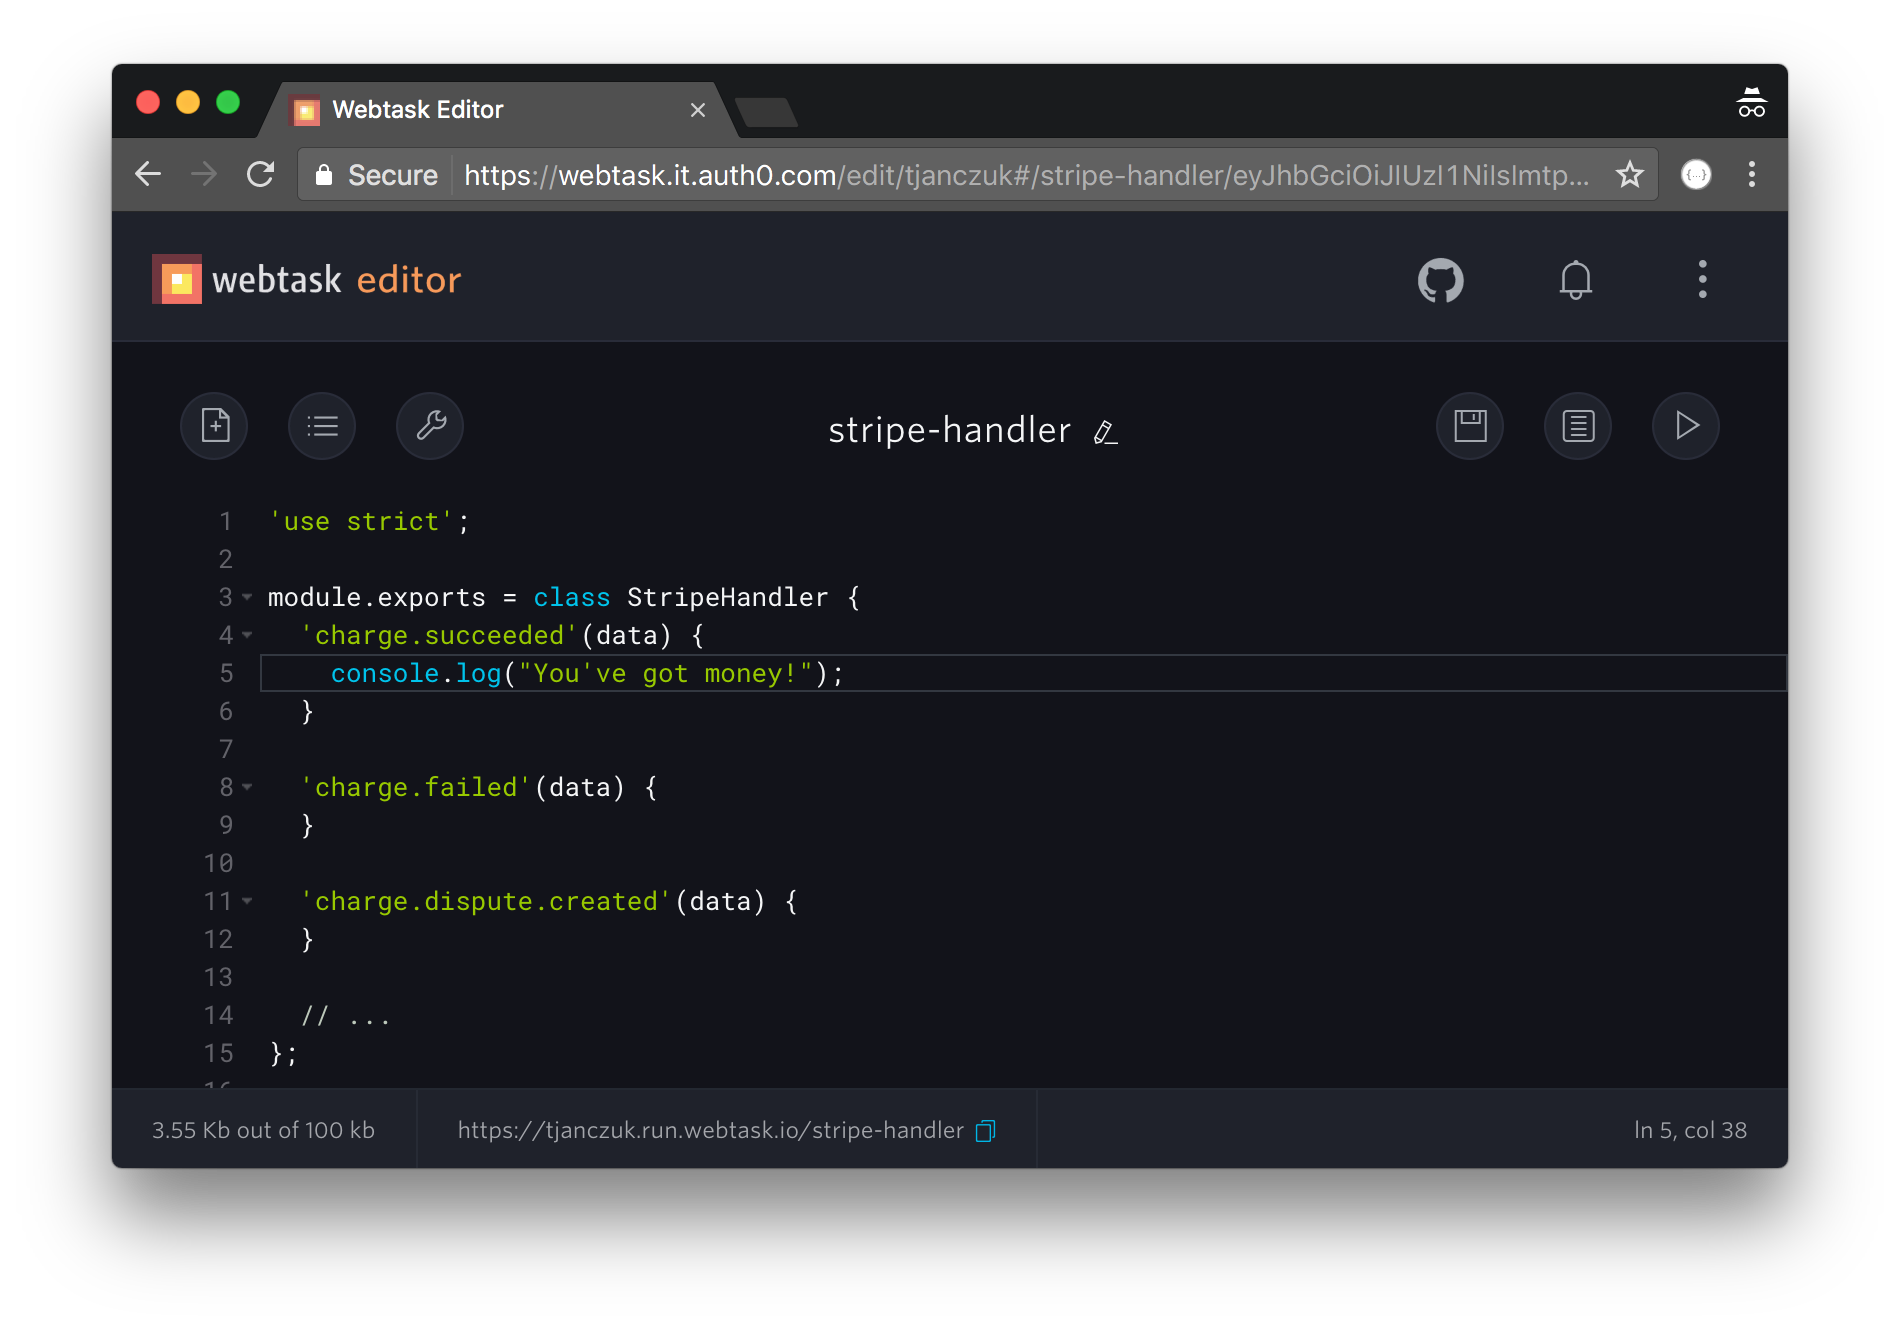
You can find the full list of available Stripe events in the starter Stripe webhook.
How is this magic possible? How do Auth0 Webtasks support a programming model that seems tailored to Stripe? The secret sauce is called a webtask compiler. Webtask compiler is a middleware that runs before the code of the webtask. One of the applications of such middleware is to support custom programming models by transpiling webtask code into one of the representations understood by the webtask platform. You have specified the webtask compiler for your Stripe webhook using the –meta parameter when you originally created it:
wt create stripe-handler.js \
  --meta wt-compiler=https://raw.githubusercontent.com/tjanczuk/wtc/master/stripe_compiler.js
You can check the implementation of the Stripe compiler here. There are also other examples of useful compilers at tjanczuk/wtc.
Authenticate your Stripe webhook
By default the endpoint you created allows anyone to call it. Obviously it is an undesired situation when money is involved. Fortunately Stripe supports Basic authentication when calling webhooks, and the Stripe compiler we use can be easily configured to enforce it.
All you need to do is to define the BASIC_AUTH secret paramater and associate it with your webtask, which can be done through the webtask editor:
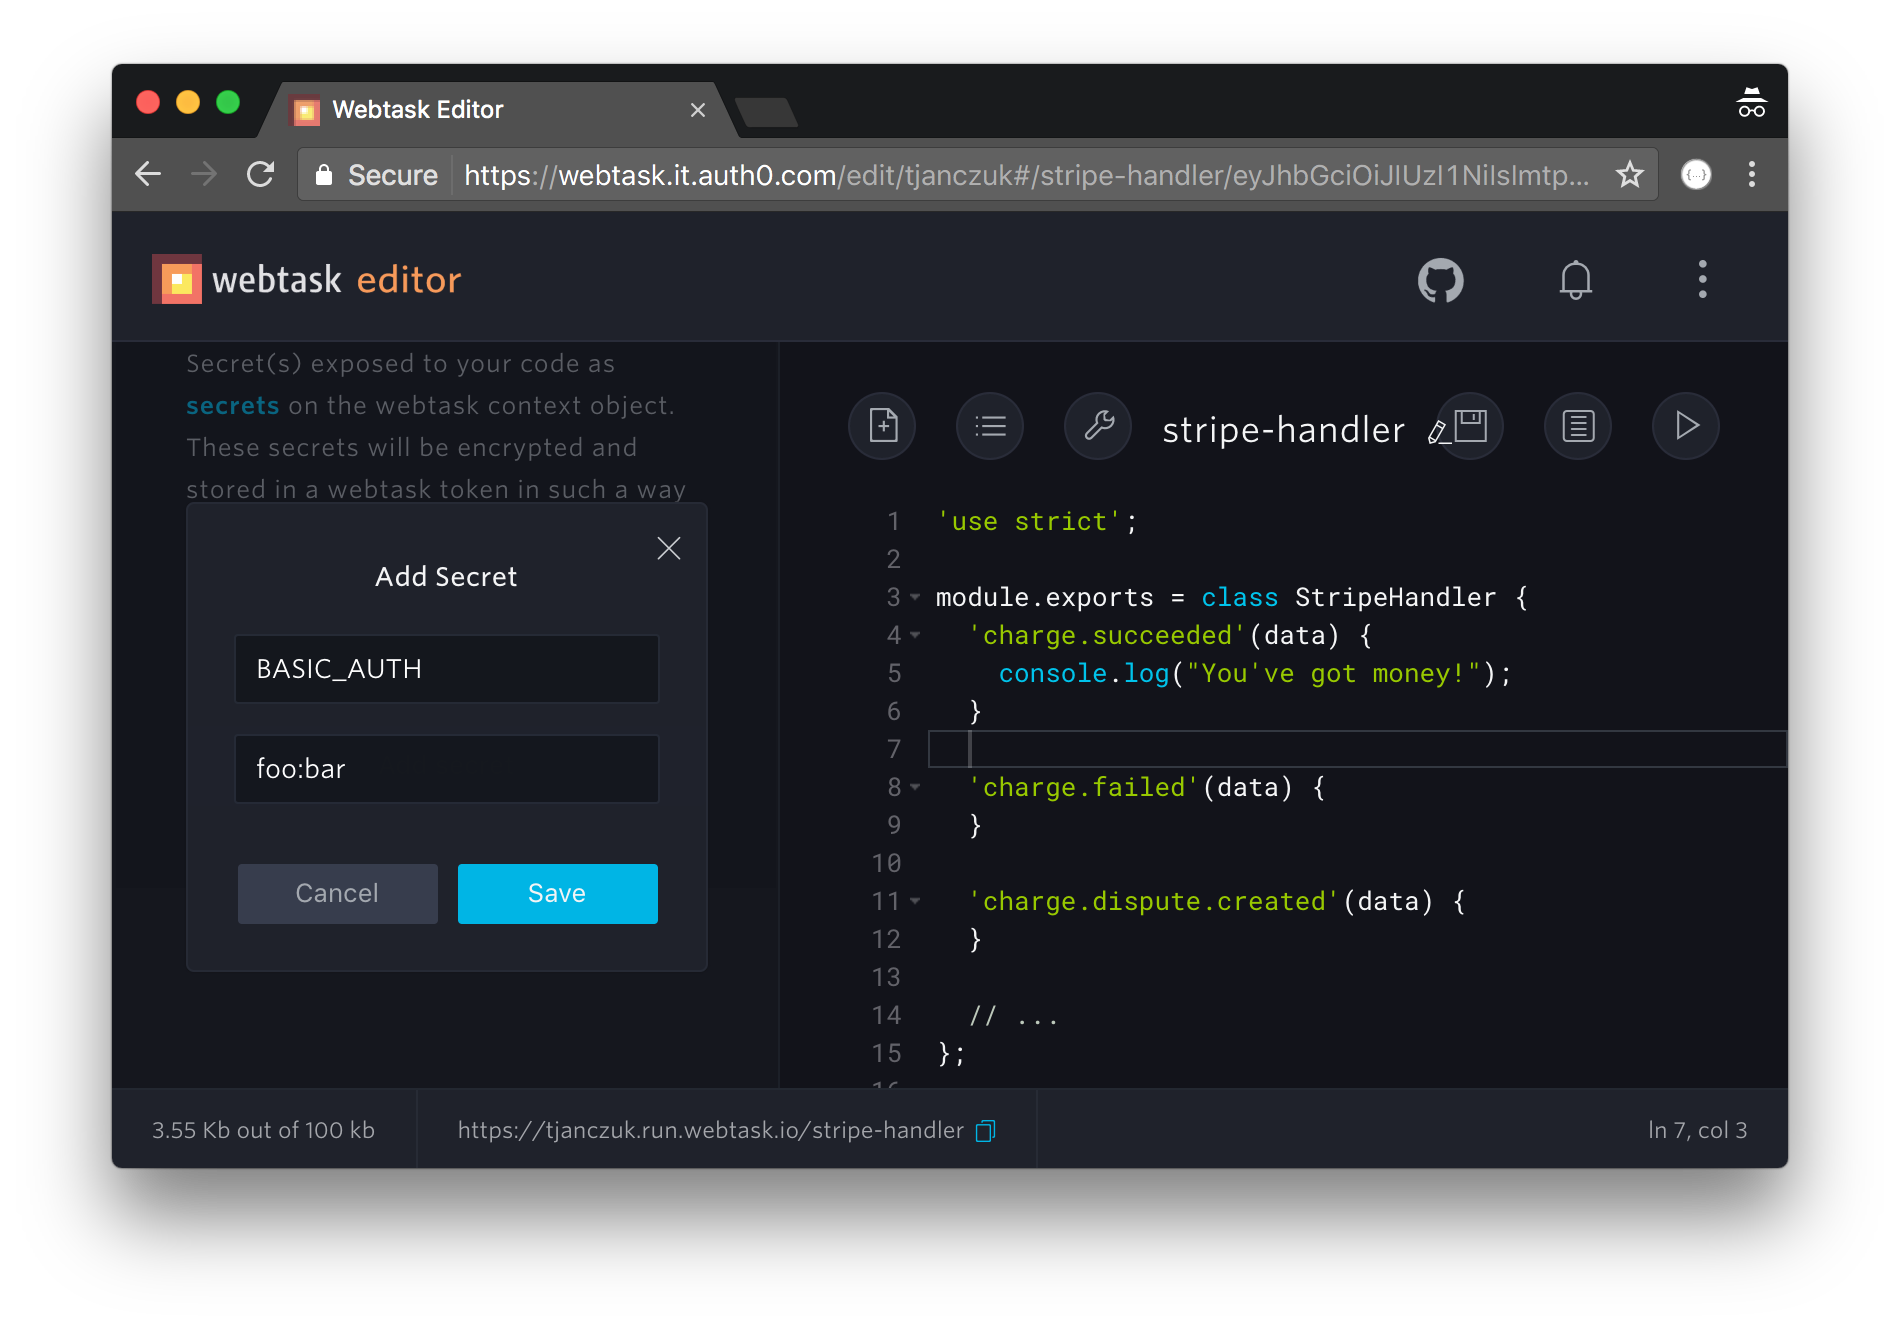
The value of this parameter is the Basic credentials the webhook will require callers to present, in the {username}:{password} format. Those who don’t will receive HTTP 403 and be sentenced to a year of hard labor building a wall. Notice your webtask code is unconcerned with this enforcement - authentication is performed within the Stripe webtask compiler described earlier.
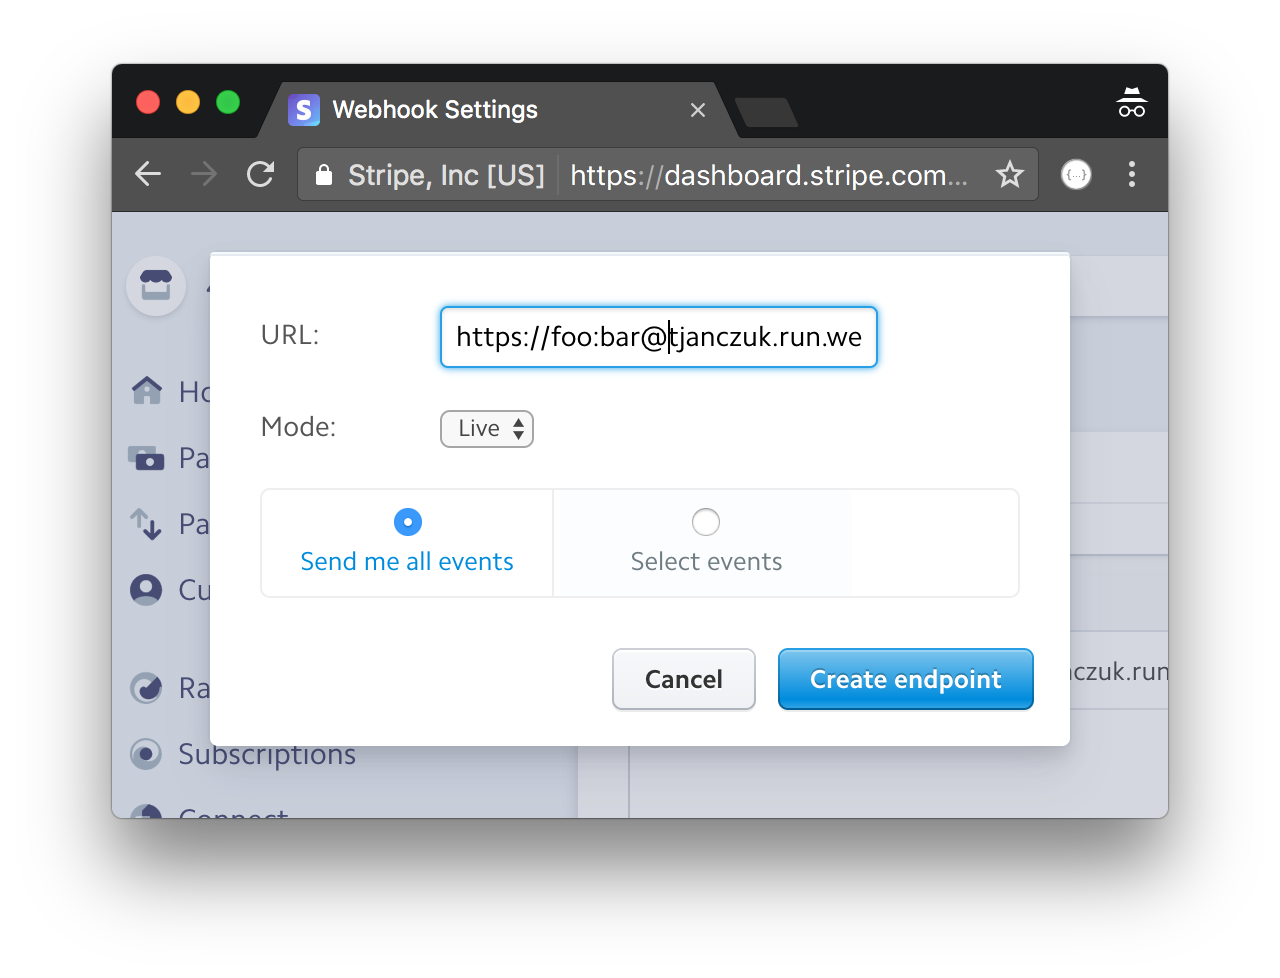
Once you configure your Stripe webtask to require basic authentication, you also need to re-configure your webhook settings in Stripe to specify the same credentials:
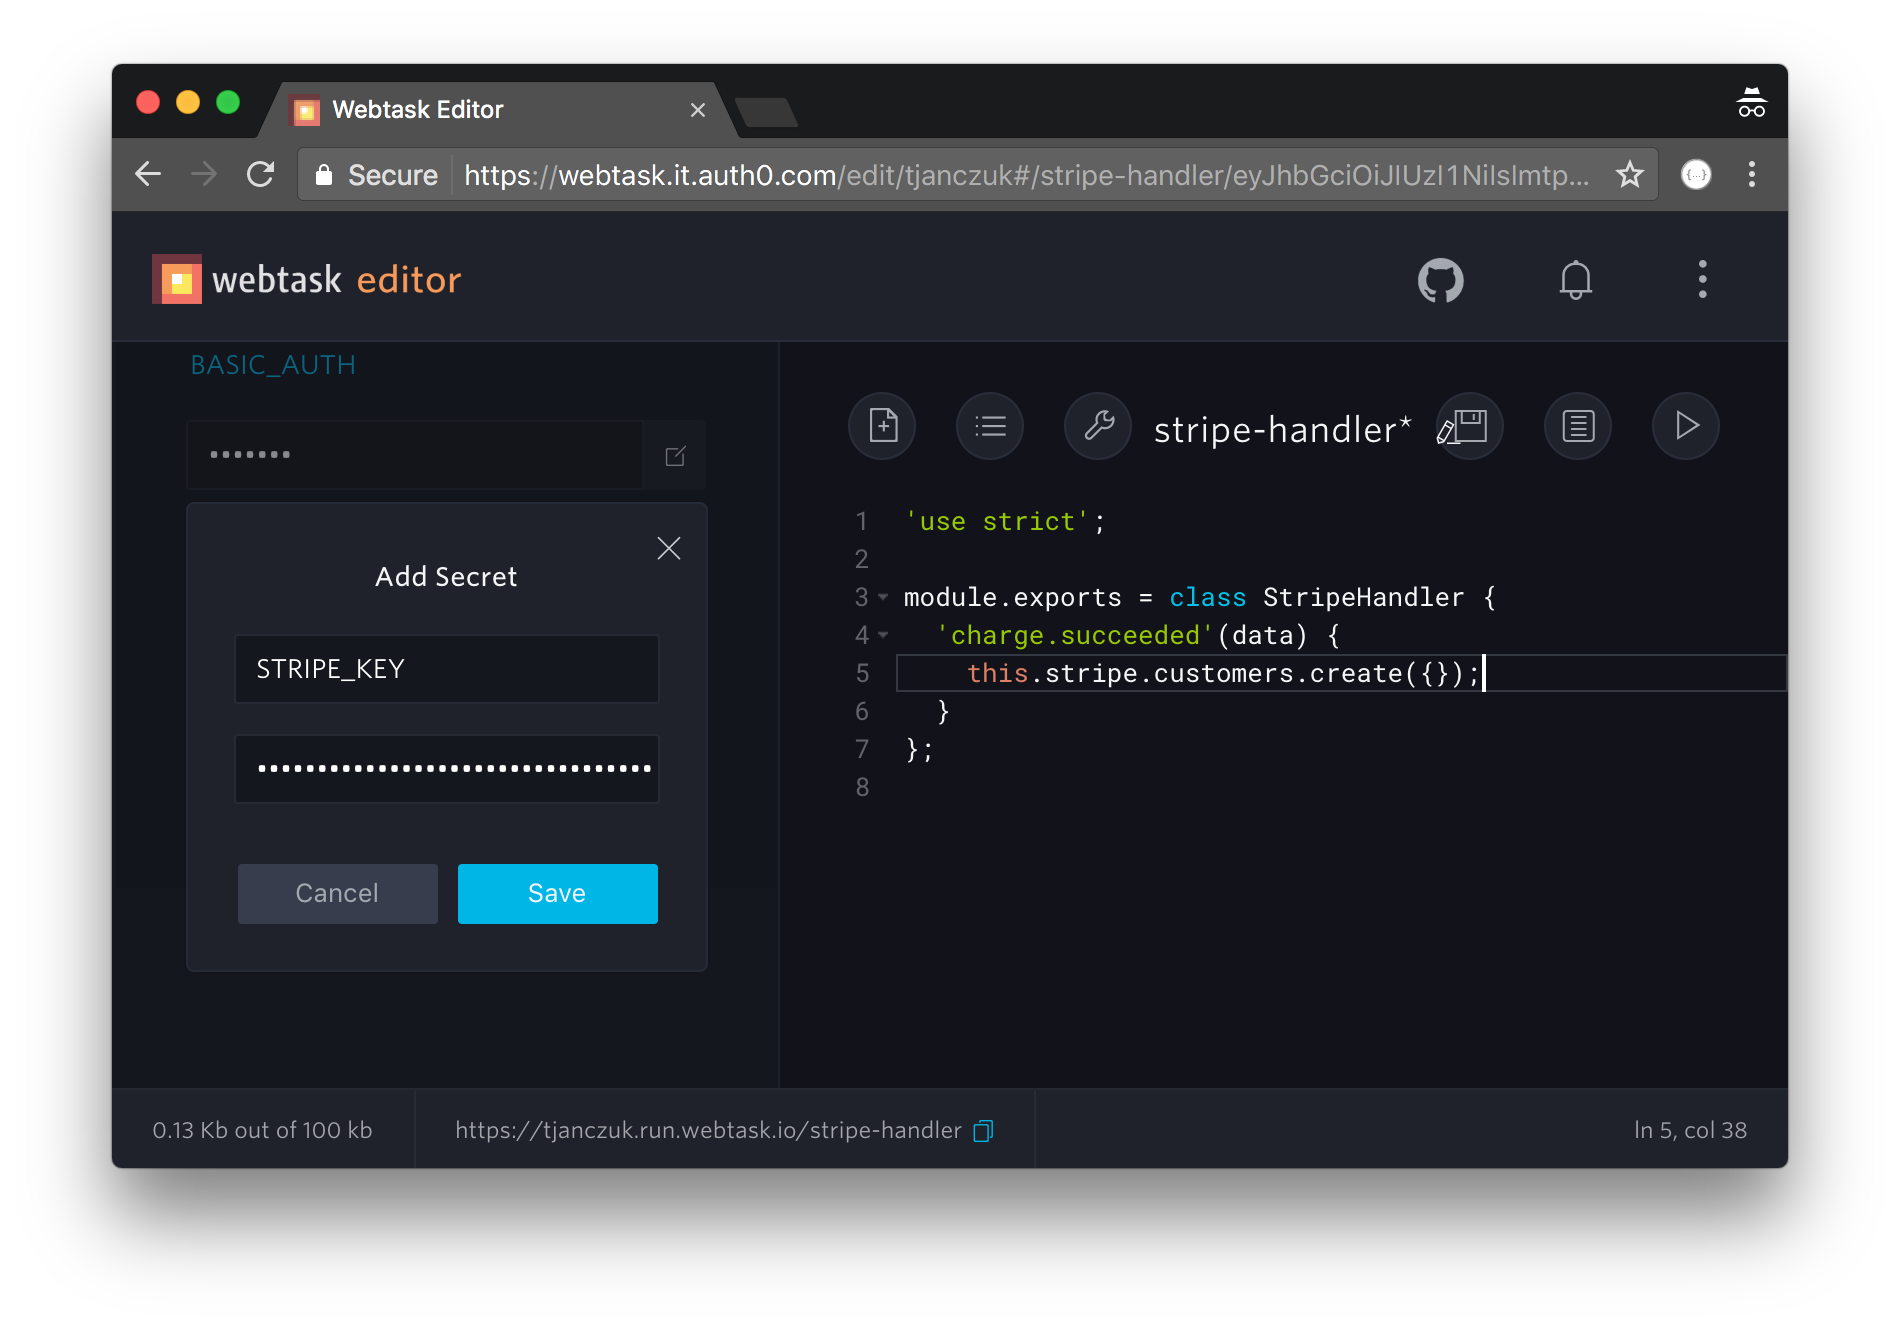
More secrets
You may want to call external services when specific events are raised. When a charge succeeds you may want to send a message to Slack. When a new customer is created, you may want to register a new account in Salesforce. When a dispute arises, you may want to use Amazon Mechanical Turk to dispatch an enforcer to the problematic customer. All of these operations require secret keys or credentials.
Auth0 Webtasks provides a convenient mechanism to associate secrets with your code and make them available at runtime. Secrets are stored encrypted at rest which is a much better idea than including them in the source code itself. You have already seen the use of the BASIC_AUTH secret parameter before, but here is how you can access the secrets within the code of your Stripe webhook:
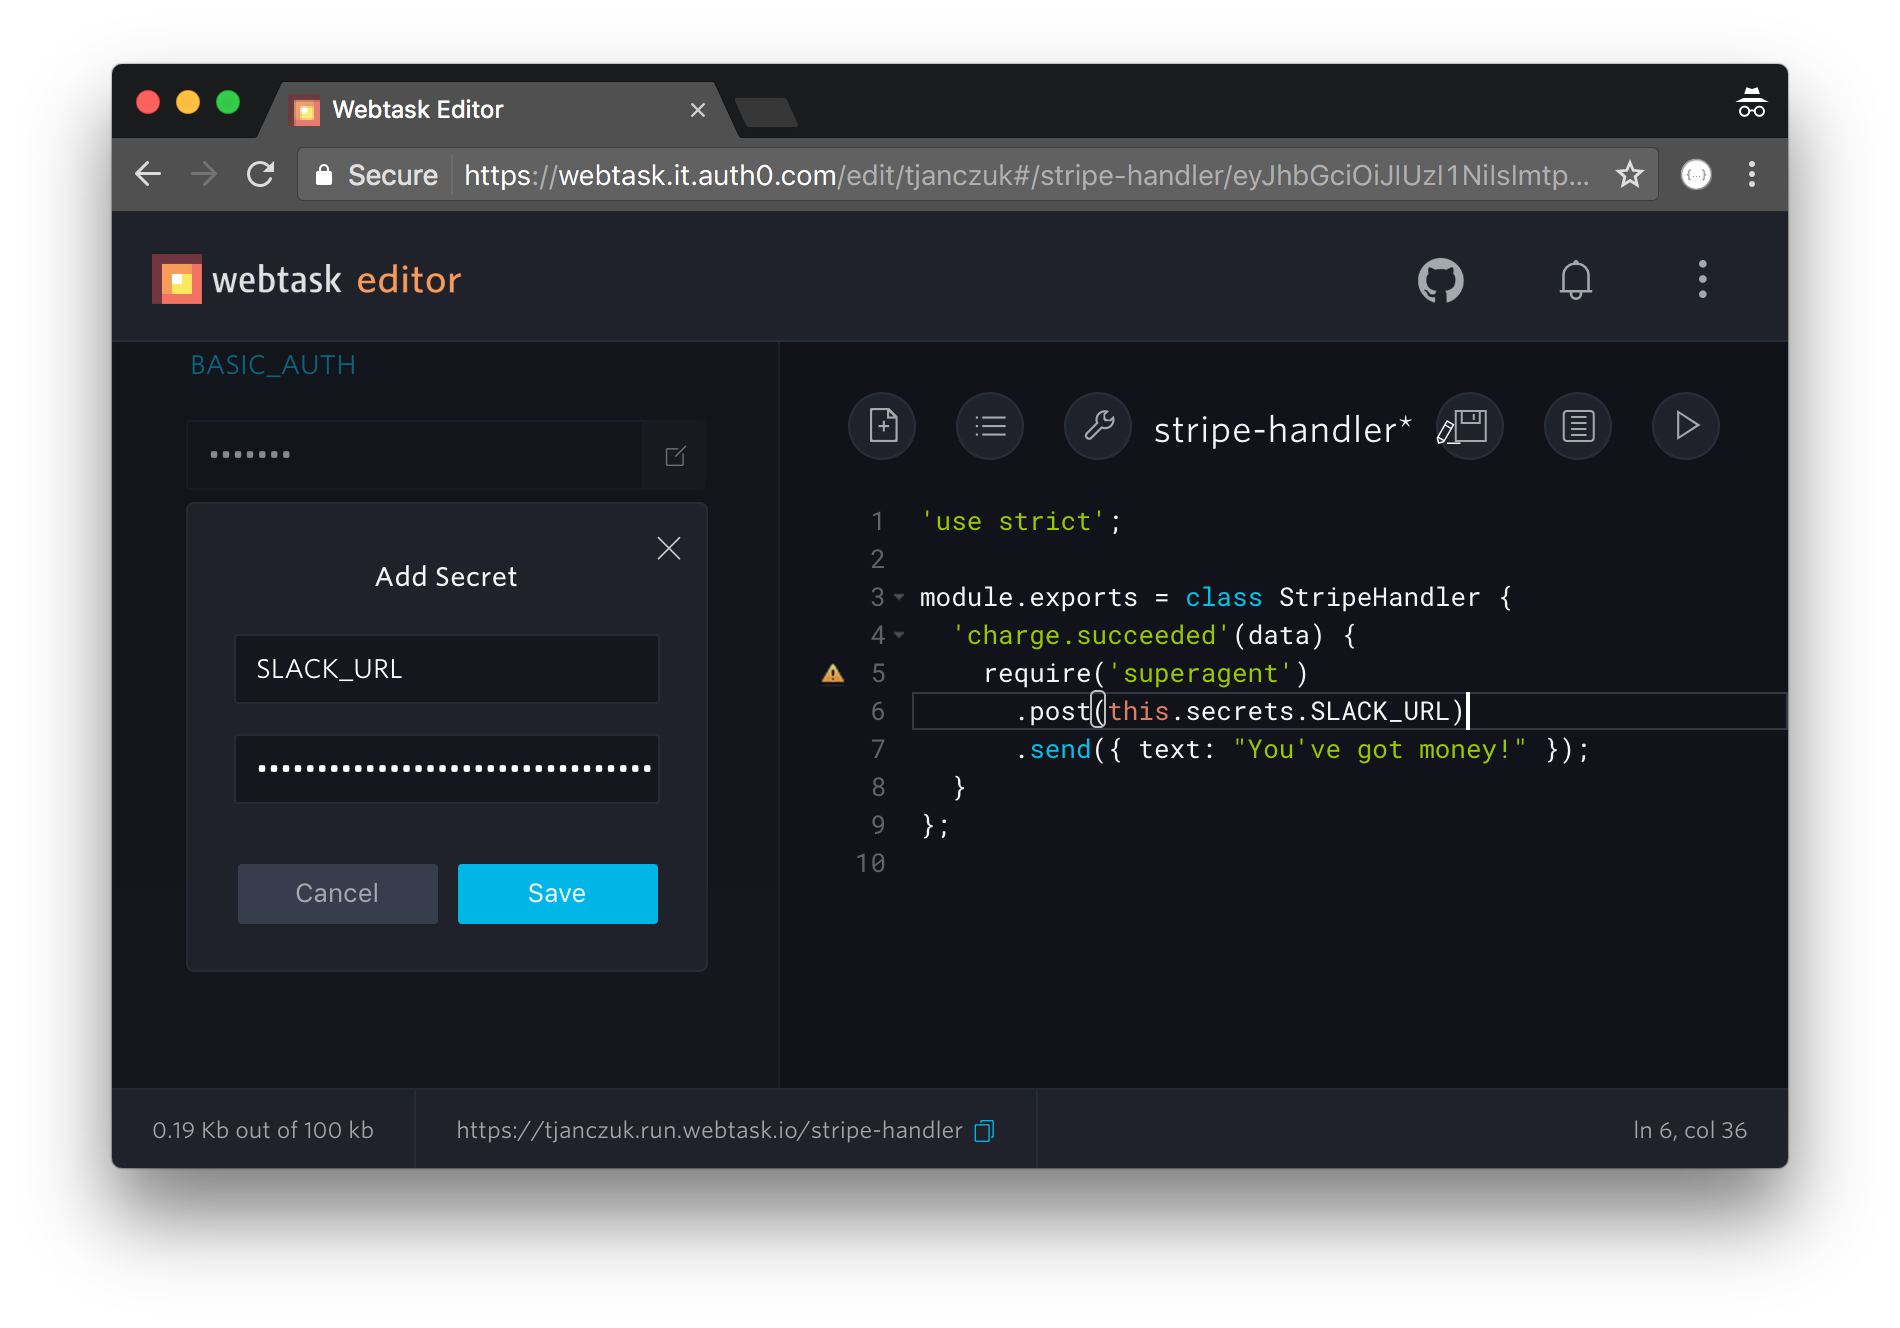
All secrets you define are available within the Stripe handler methods as this.secrets hash.
Calling Stripe APIs
The cherry on top of the Stripe programming model is a simple mechanism to call back into Stripe APIs from within your webhook. All you need to do is to specify the STRIPE_KEY as one of the webtask secrets, and you can access a pre-configured stripe client on this.stripe property within your webtask:
The client is based on the stripe NPM module.
Want more?
If you are writing a mobile or HTML5 single-page application, you may also be interested in how Auth0 Webtasks can help you integrate Stripe payments without the need for a first class backend. Check it out!