Auth0 Webtasks allow you to create lightweight, serverless web apps and microservices without worrying about hosting, yet giving you full flexibility of writing code in Node.js. This post explains how you can use webtasks with your own custom domain name and SSL, for free.
TL;DR;
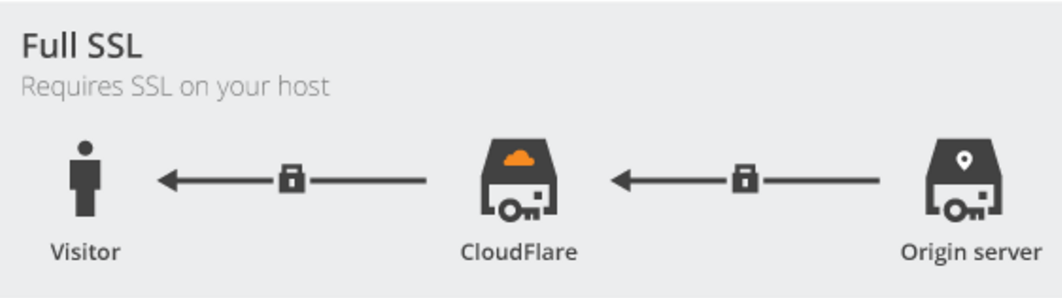
Auth0 Webtask runtime is normally accessible at https://webtask.it.auth0.com. You can configure access to webtasks using your own domain name by having your DNS managed by CloudFlare and setting up the Universal SSL mechanism in Full SSL mode. This is completely free.
Step by step
Below are step-by-step instructions to setting up access to Auth0 webtasks via https://serverless.host, an oxymoronic domain name I just reserved for the purpose of this excercise.
1. Get yourself a custom domain
Wherever you bought and maintain your custom domain name, the rest of this setup assumes you have control over the name servers this domain is configured with and can change them to point to CloudFlare. I registered serverless.host domain with NameCheap which supports configuring custom name servers to replace theirs.
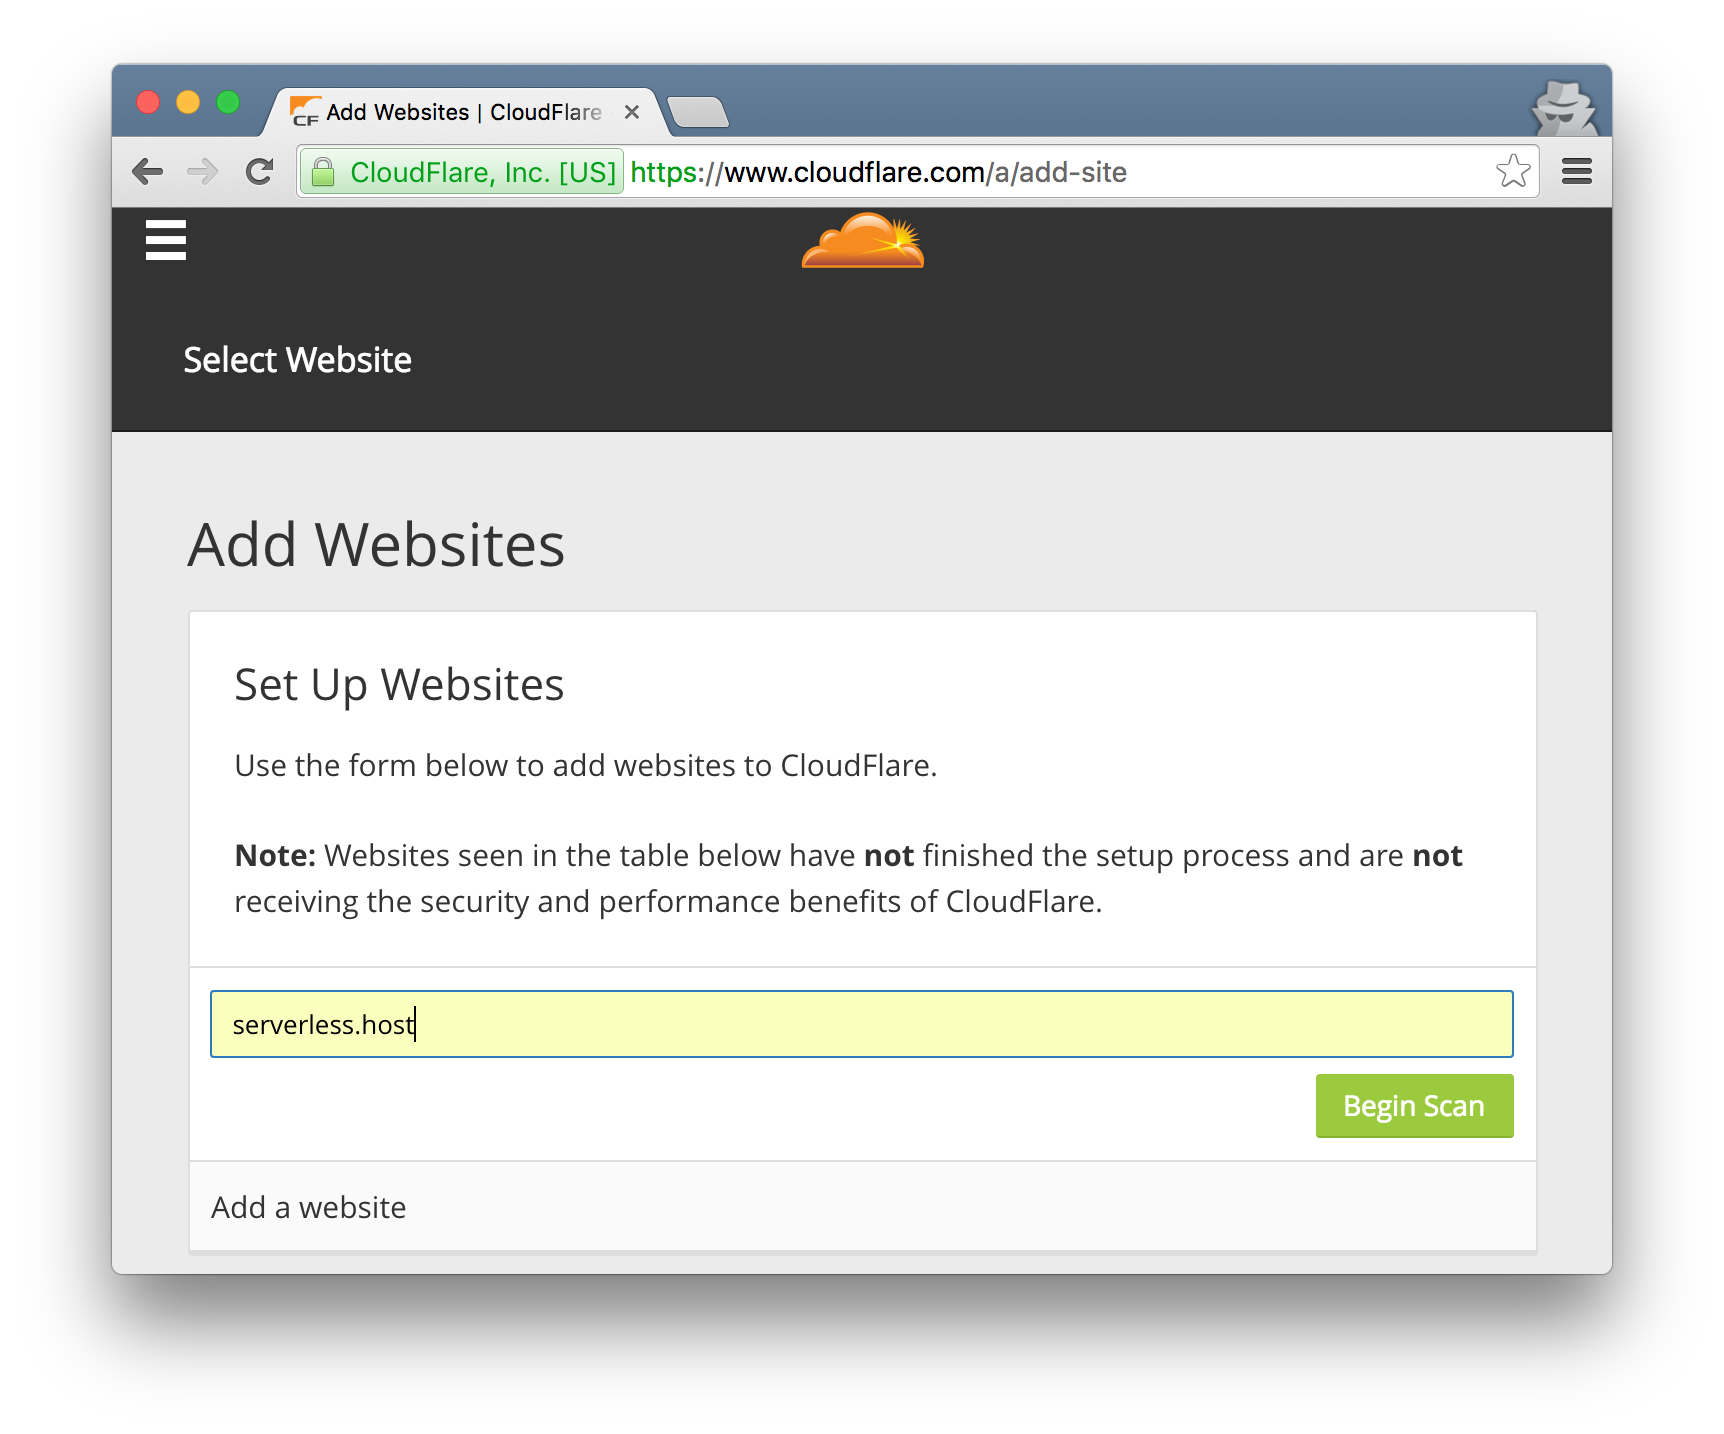
2. Set up your custom domain in CloudFlare.
Create a CloudFlare account if you don’t have one. Then add a new website through the CloudFlare’s dashboard, specifying your custom domain name:
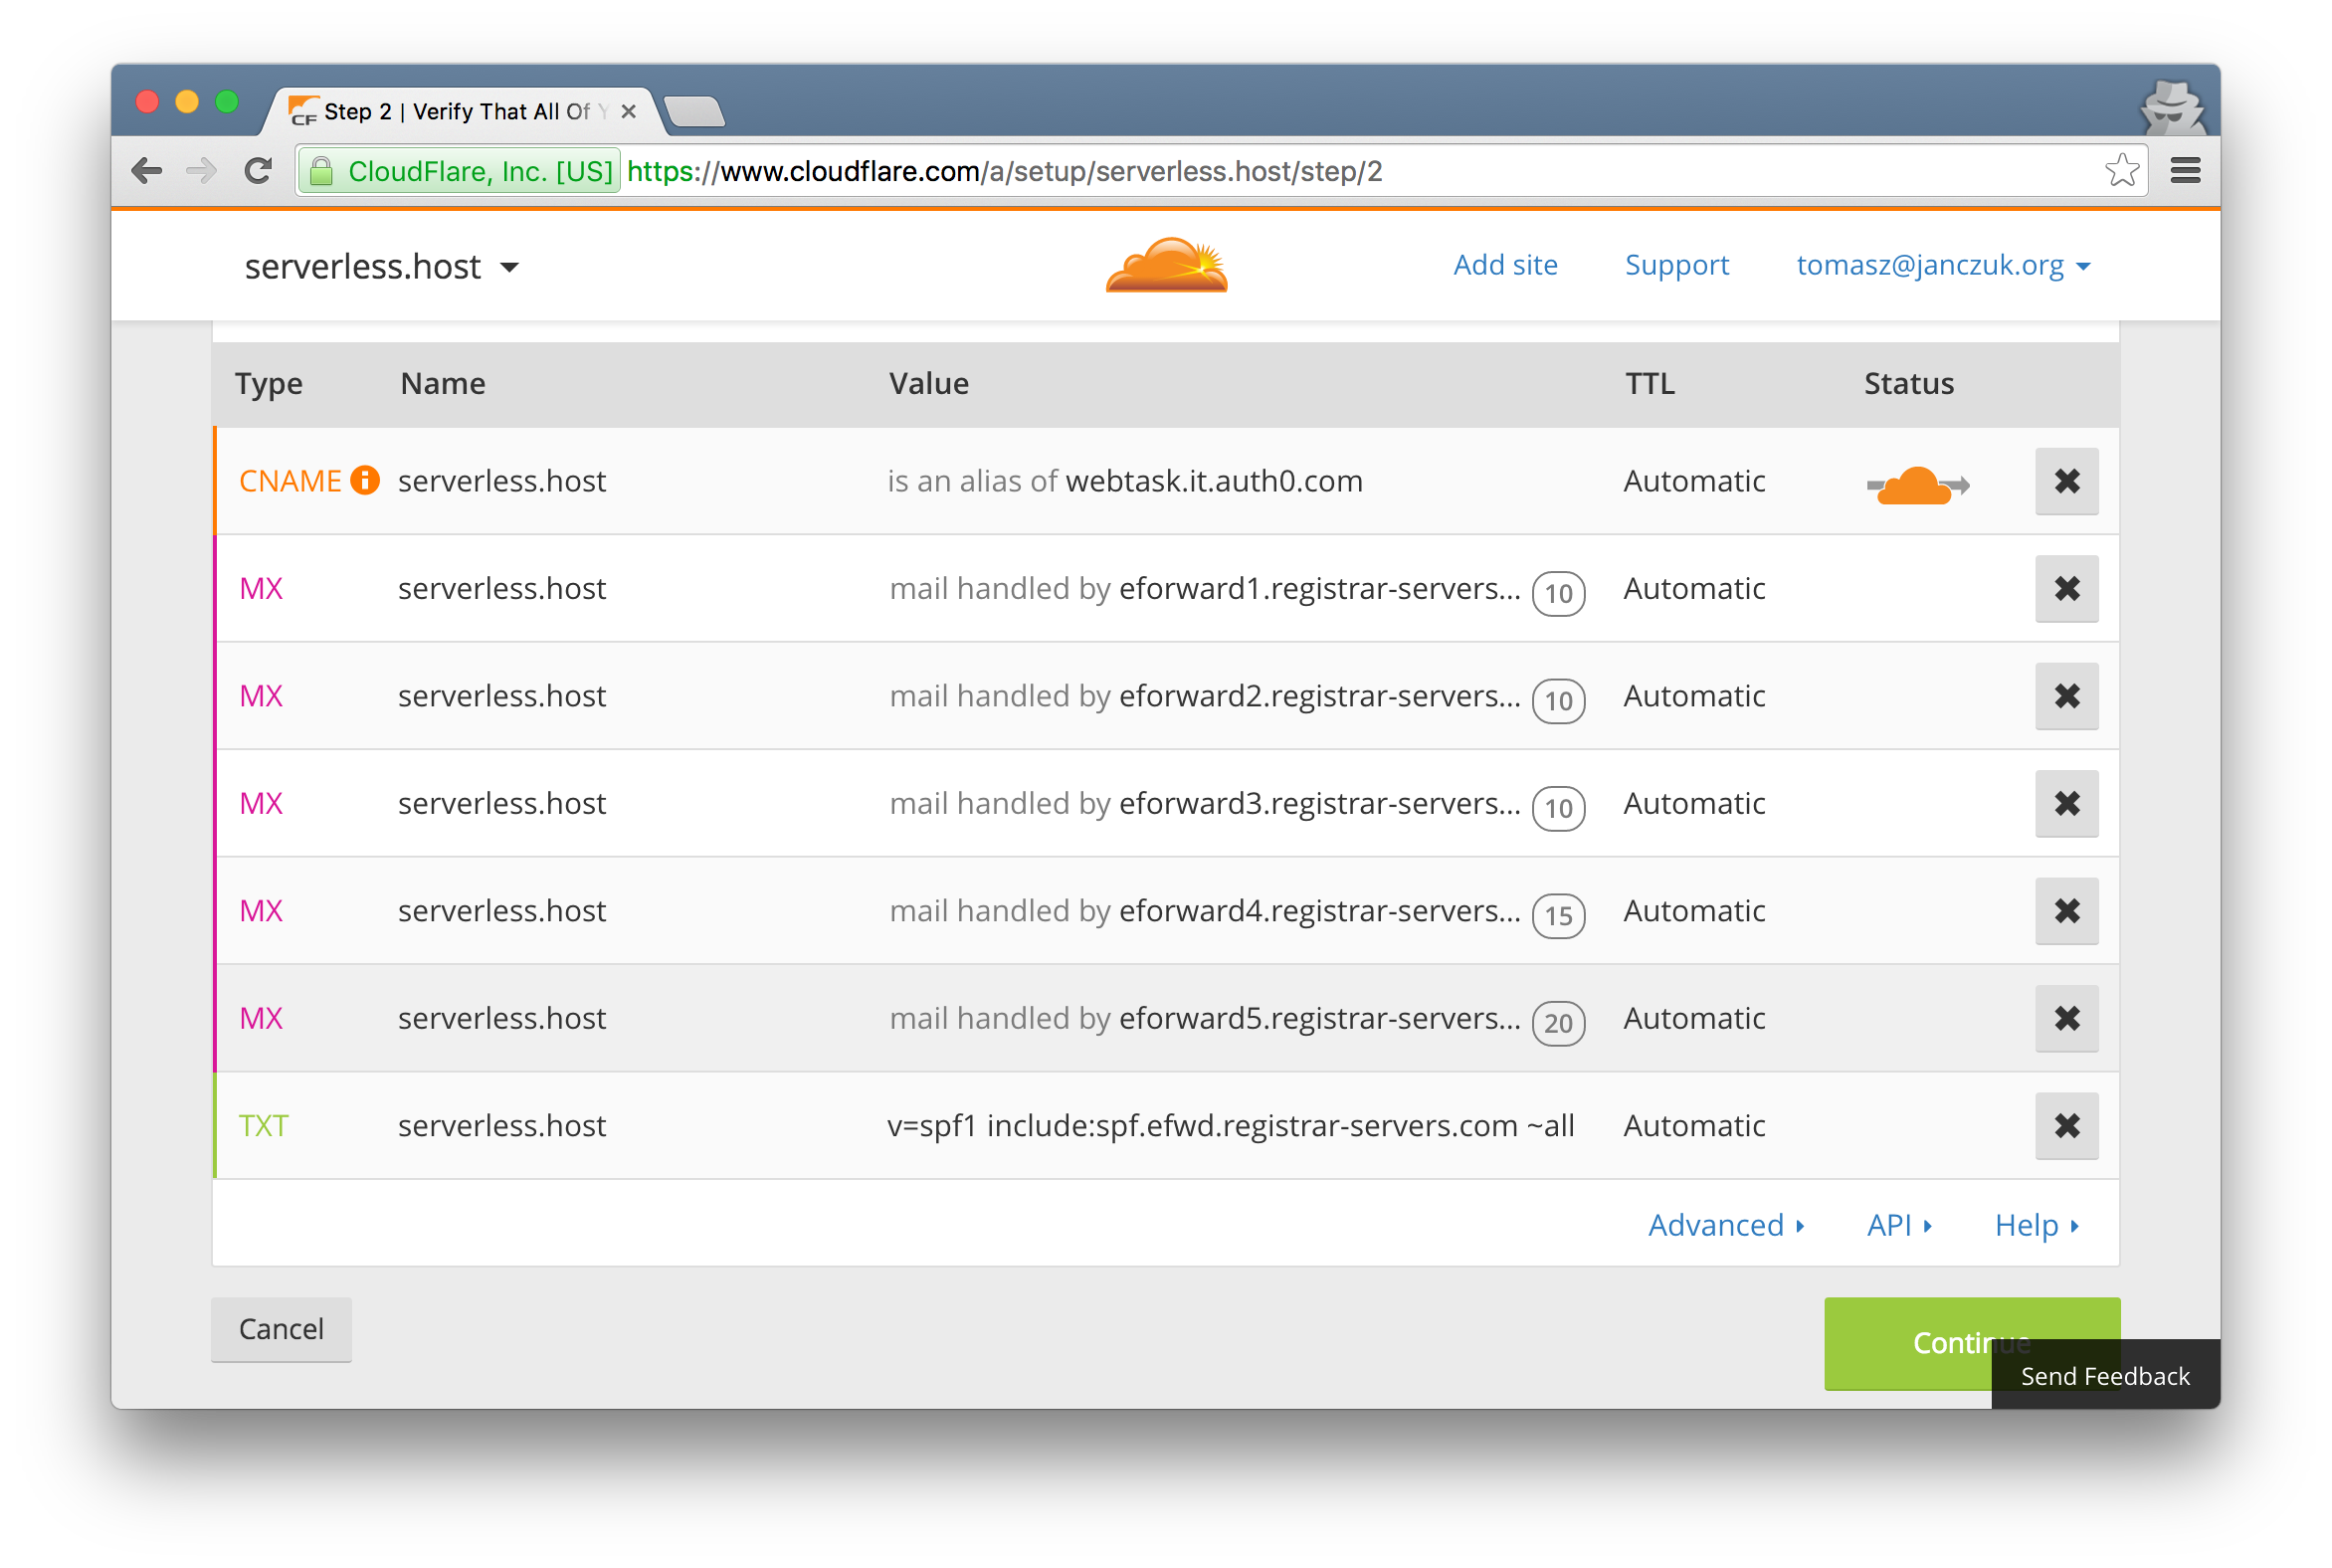
3. Set up CNAME record from your custom domain to webtasks
Once CloudFlare finishes scanning your DNS records from your current registrar, you will have an opportunity to modify them. Add a new CNAME record that maps your custom domain, serverless.host in this example, to webtask.it.auth0.com (or whichever hostname your webtask account is using). Make sure that CloudFlare is enabled for that domain as indicated by the orange cloud in the Status column:
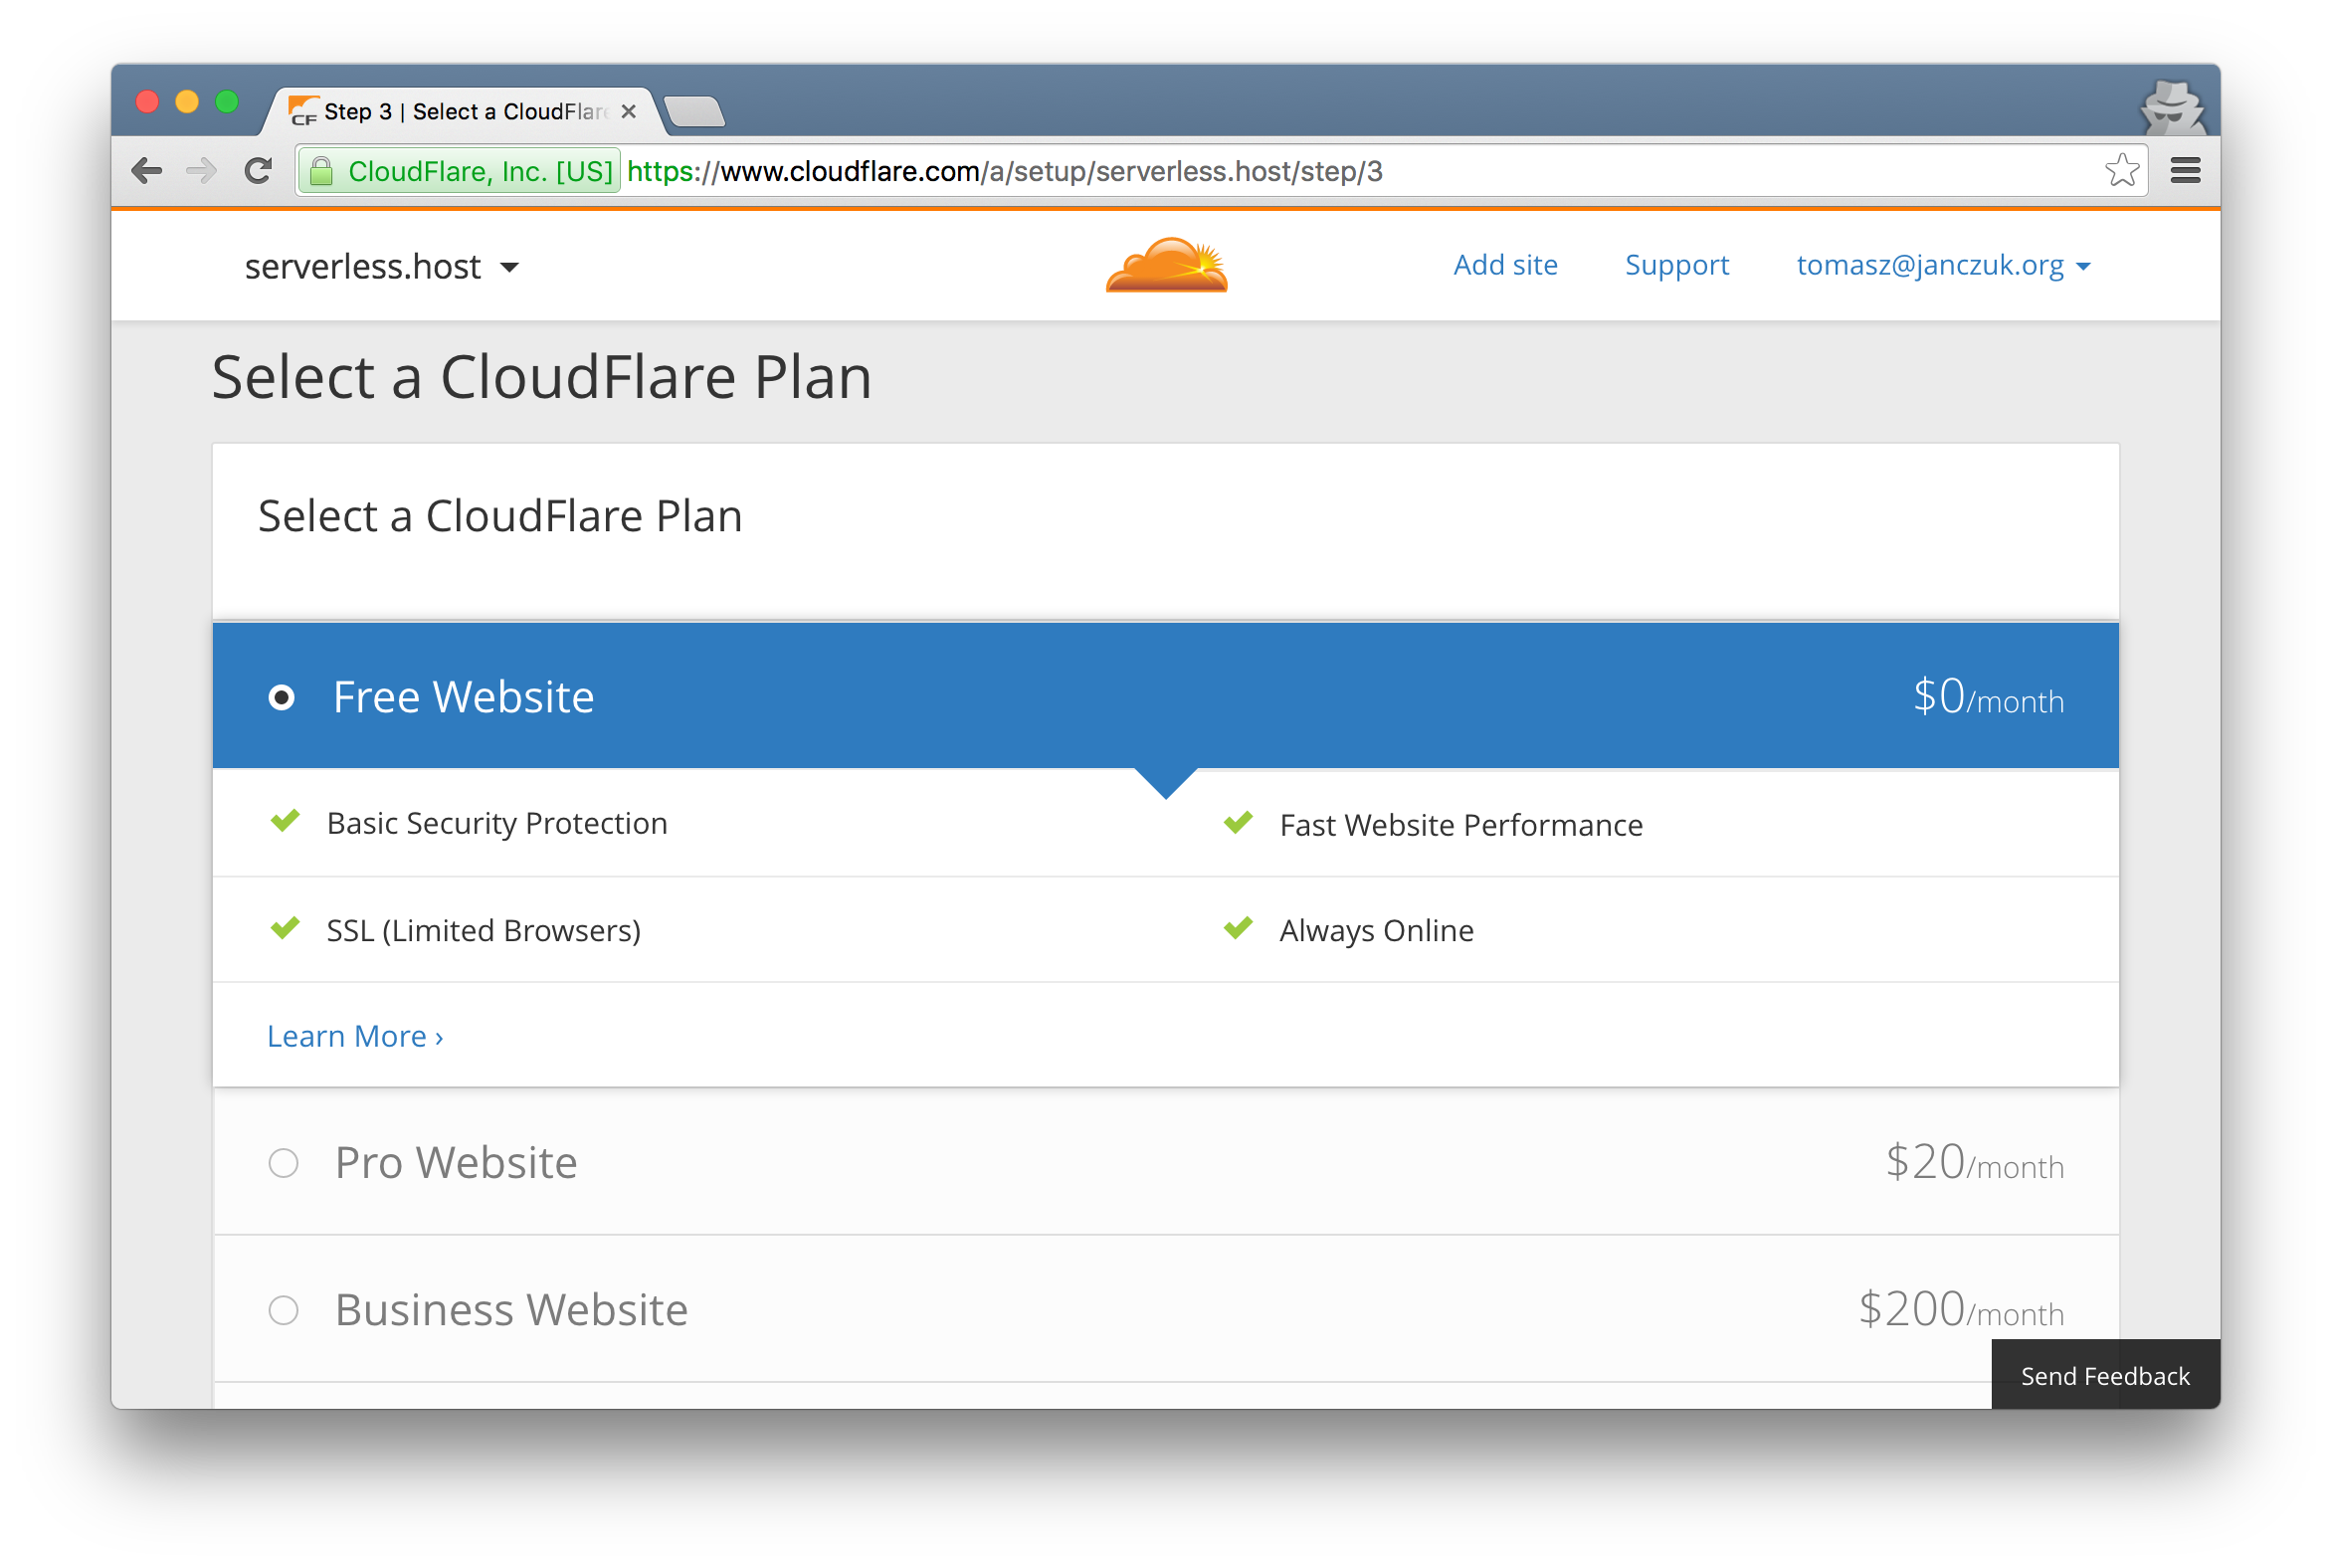
4. Get free stuff
Next you will be asked which CloudFlare plan to elect. Fortunately you don’t need to part with your money to have CloudFlare support SSL-secured access to Auth0 Webtasks using your custom domain name. Choose Free:
5. Switch nameservers to CloudFlare
It is time to pull the trigger. CloudFlare will provide you with new nameserver names which you need to set as the nameservers for your custom domain through your domain registrar:
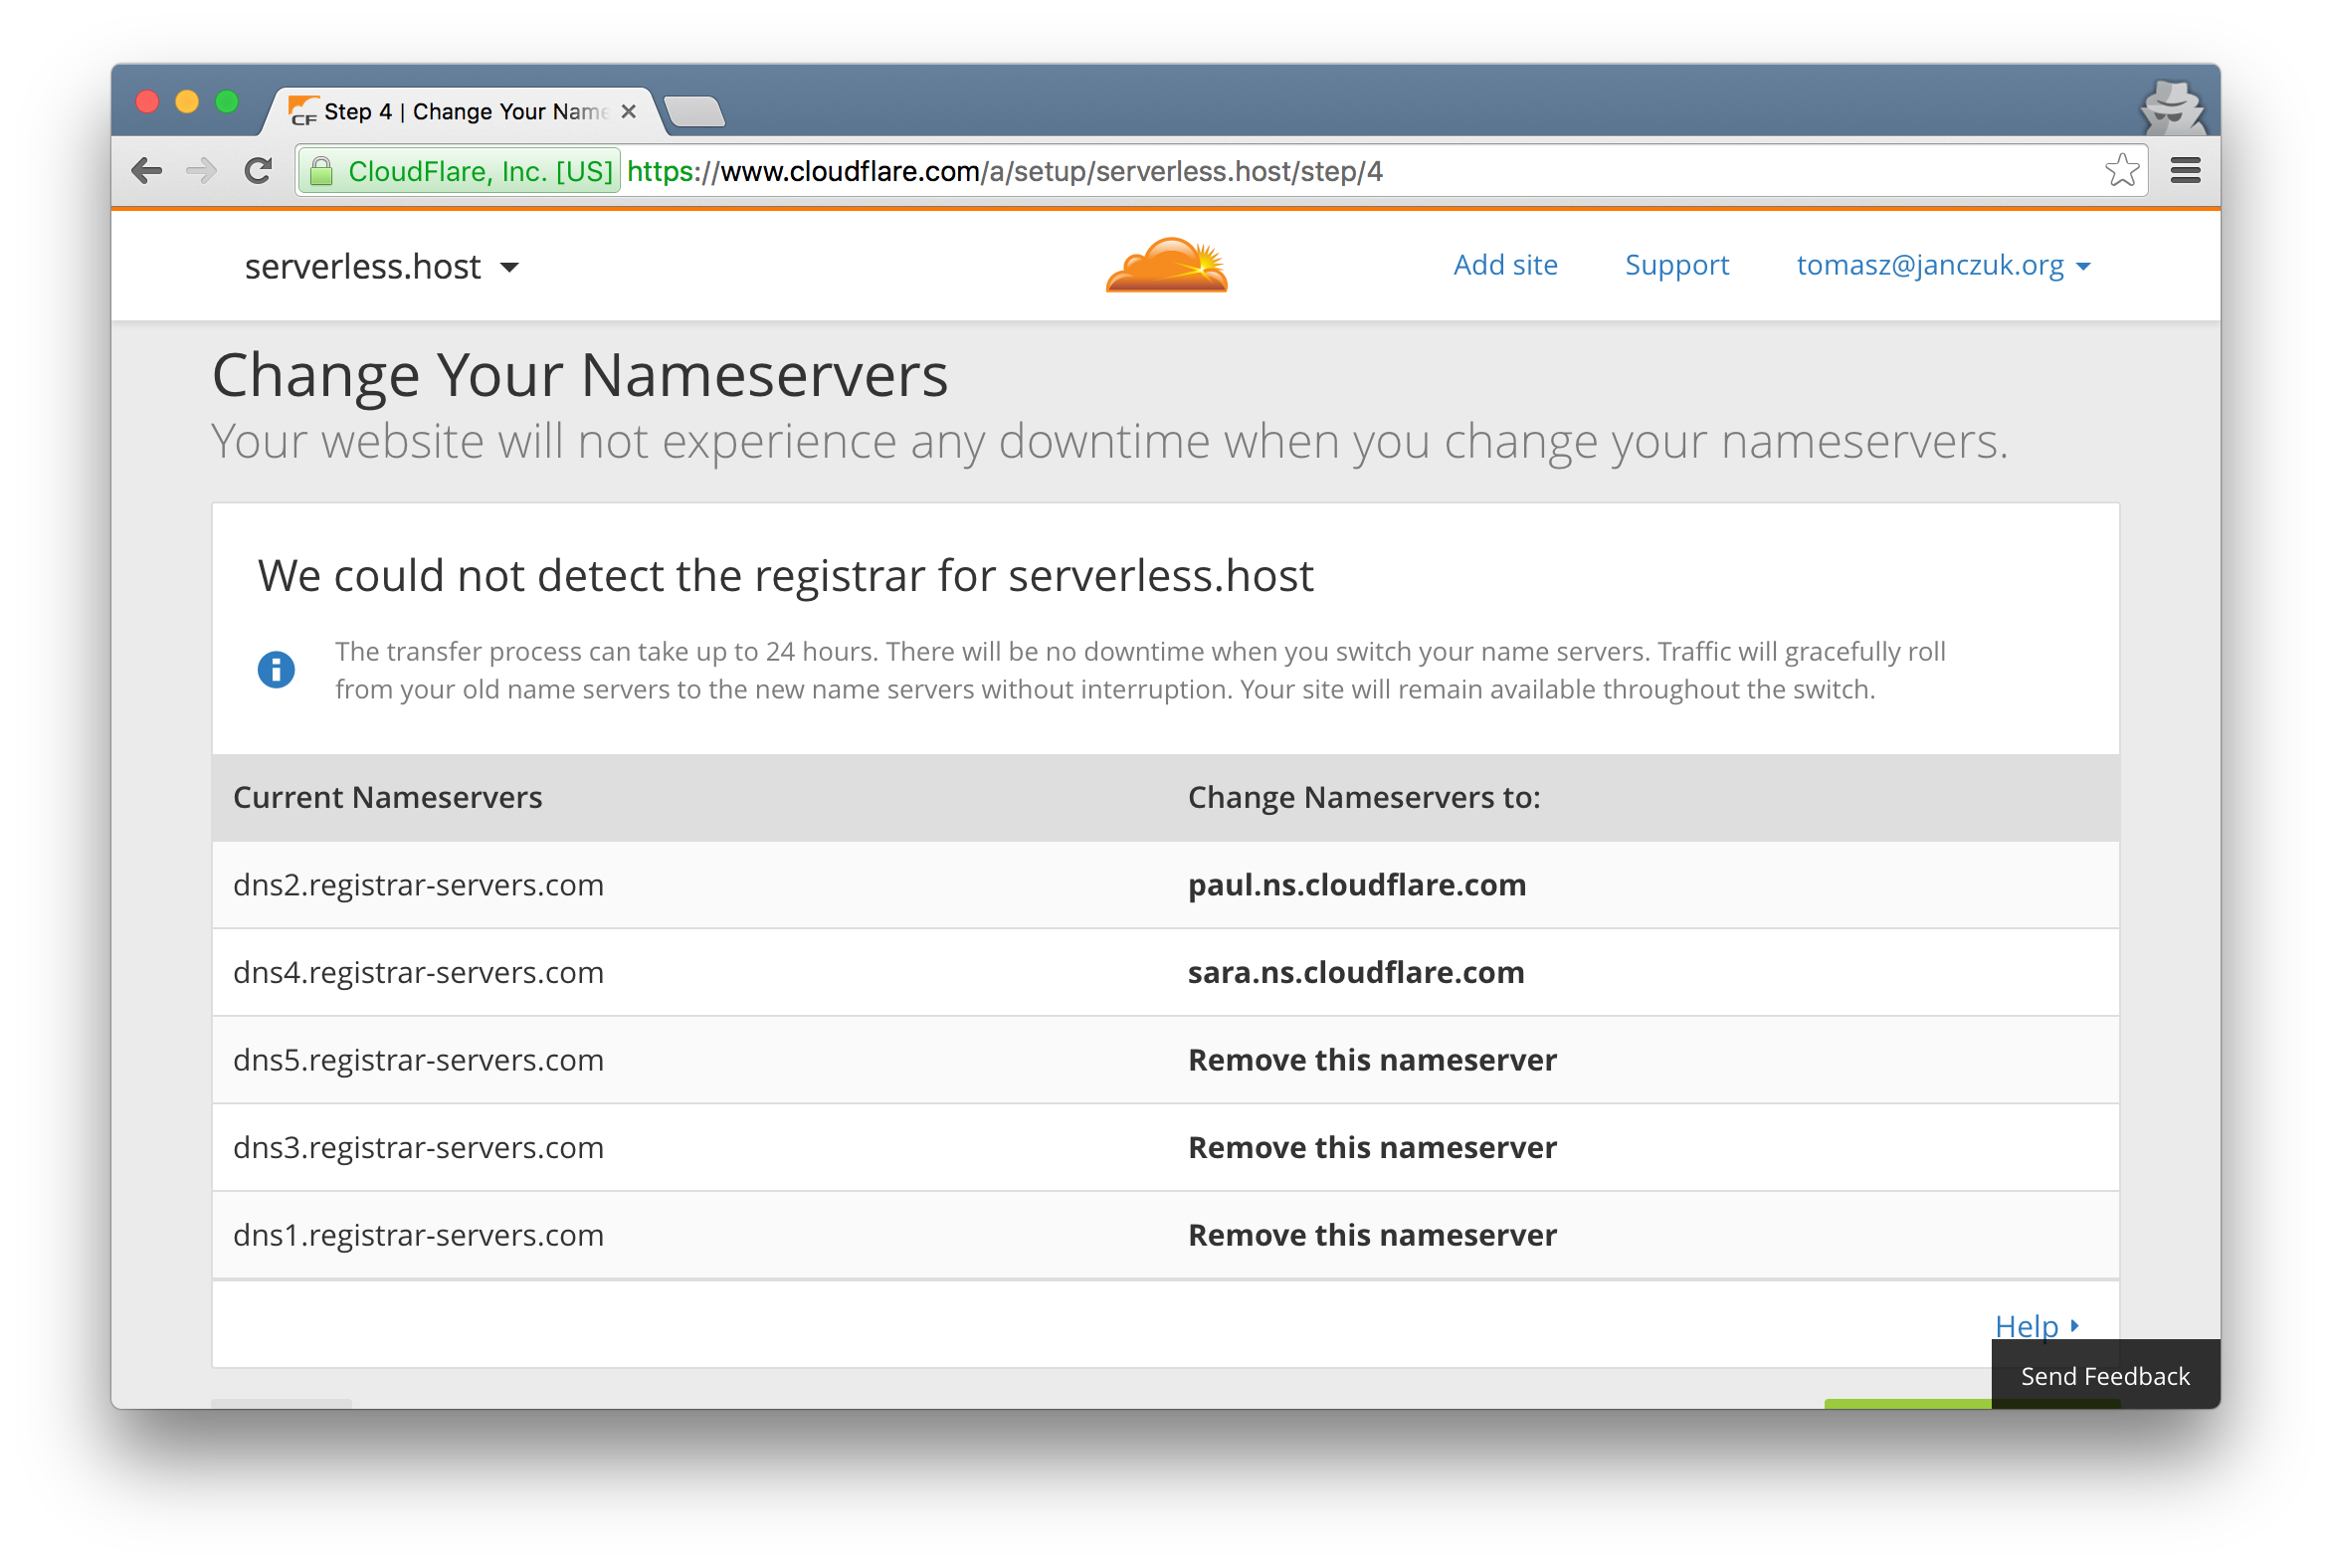
The process here will be different depending what your domain registrar is. In my case I am using NameCheap and this is what I had to do to configure the nameservers provided to me by CloudFlare for my custom serverless.host domain:
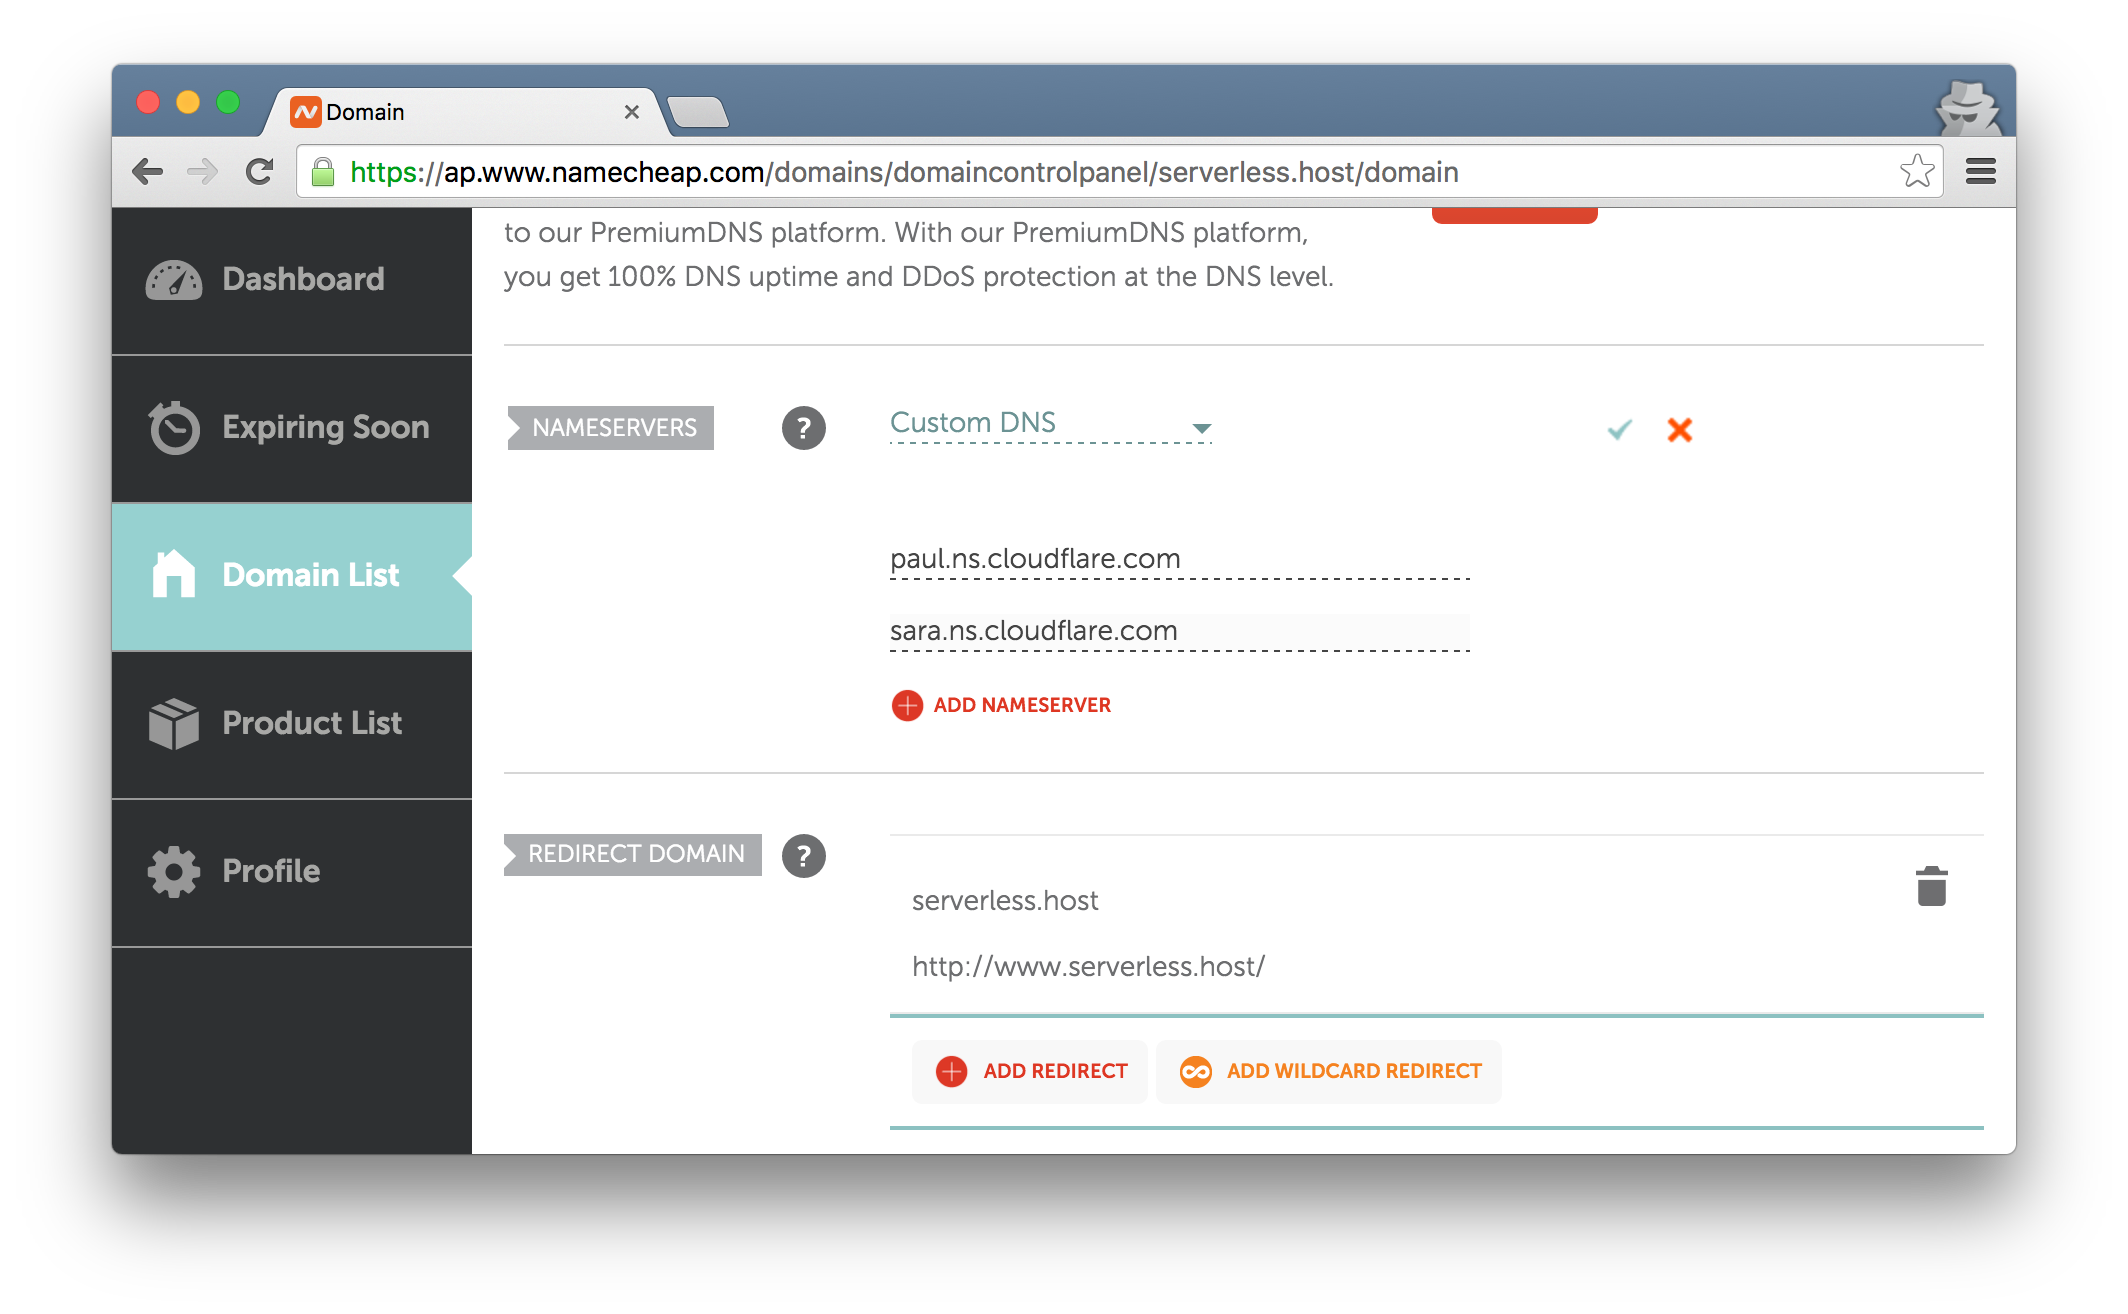
The change of nameservers requires some time to propagate. CloudFlare dashboard will tell you when the change became effective.
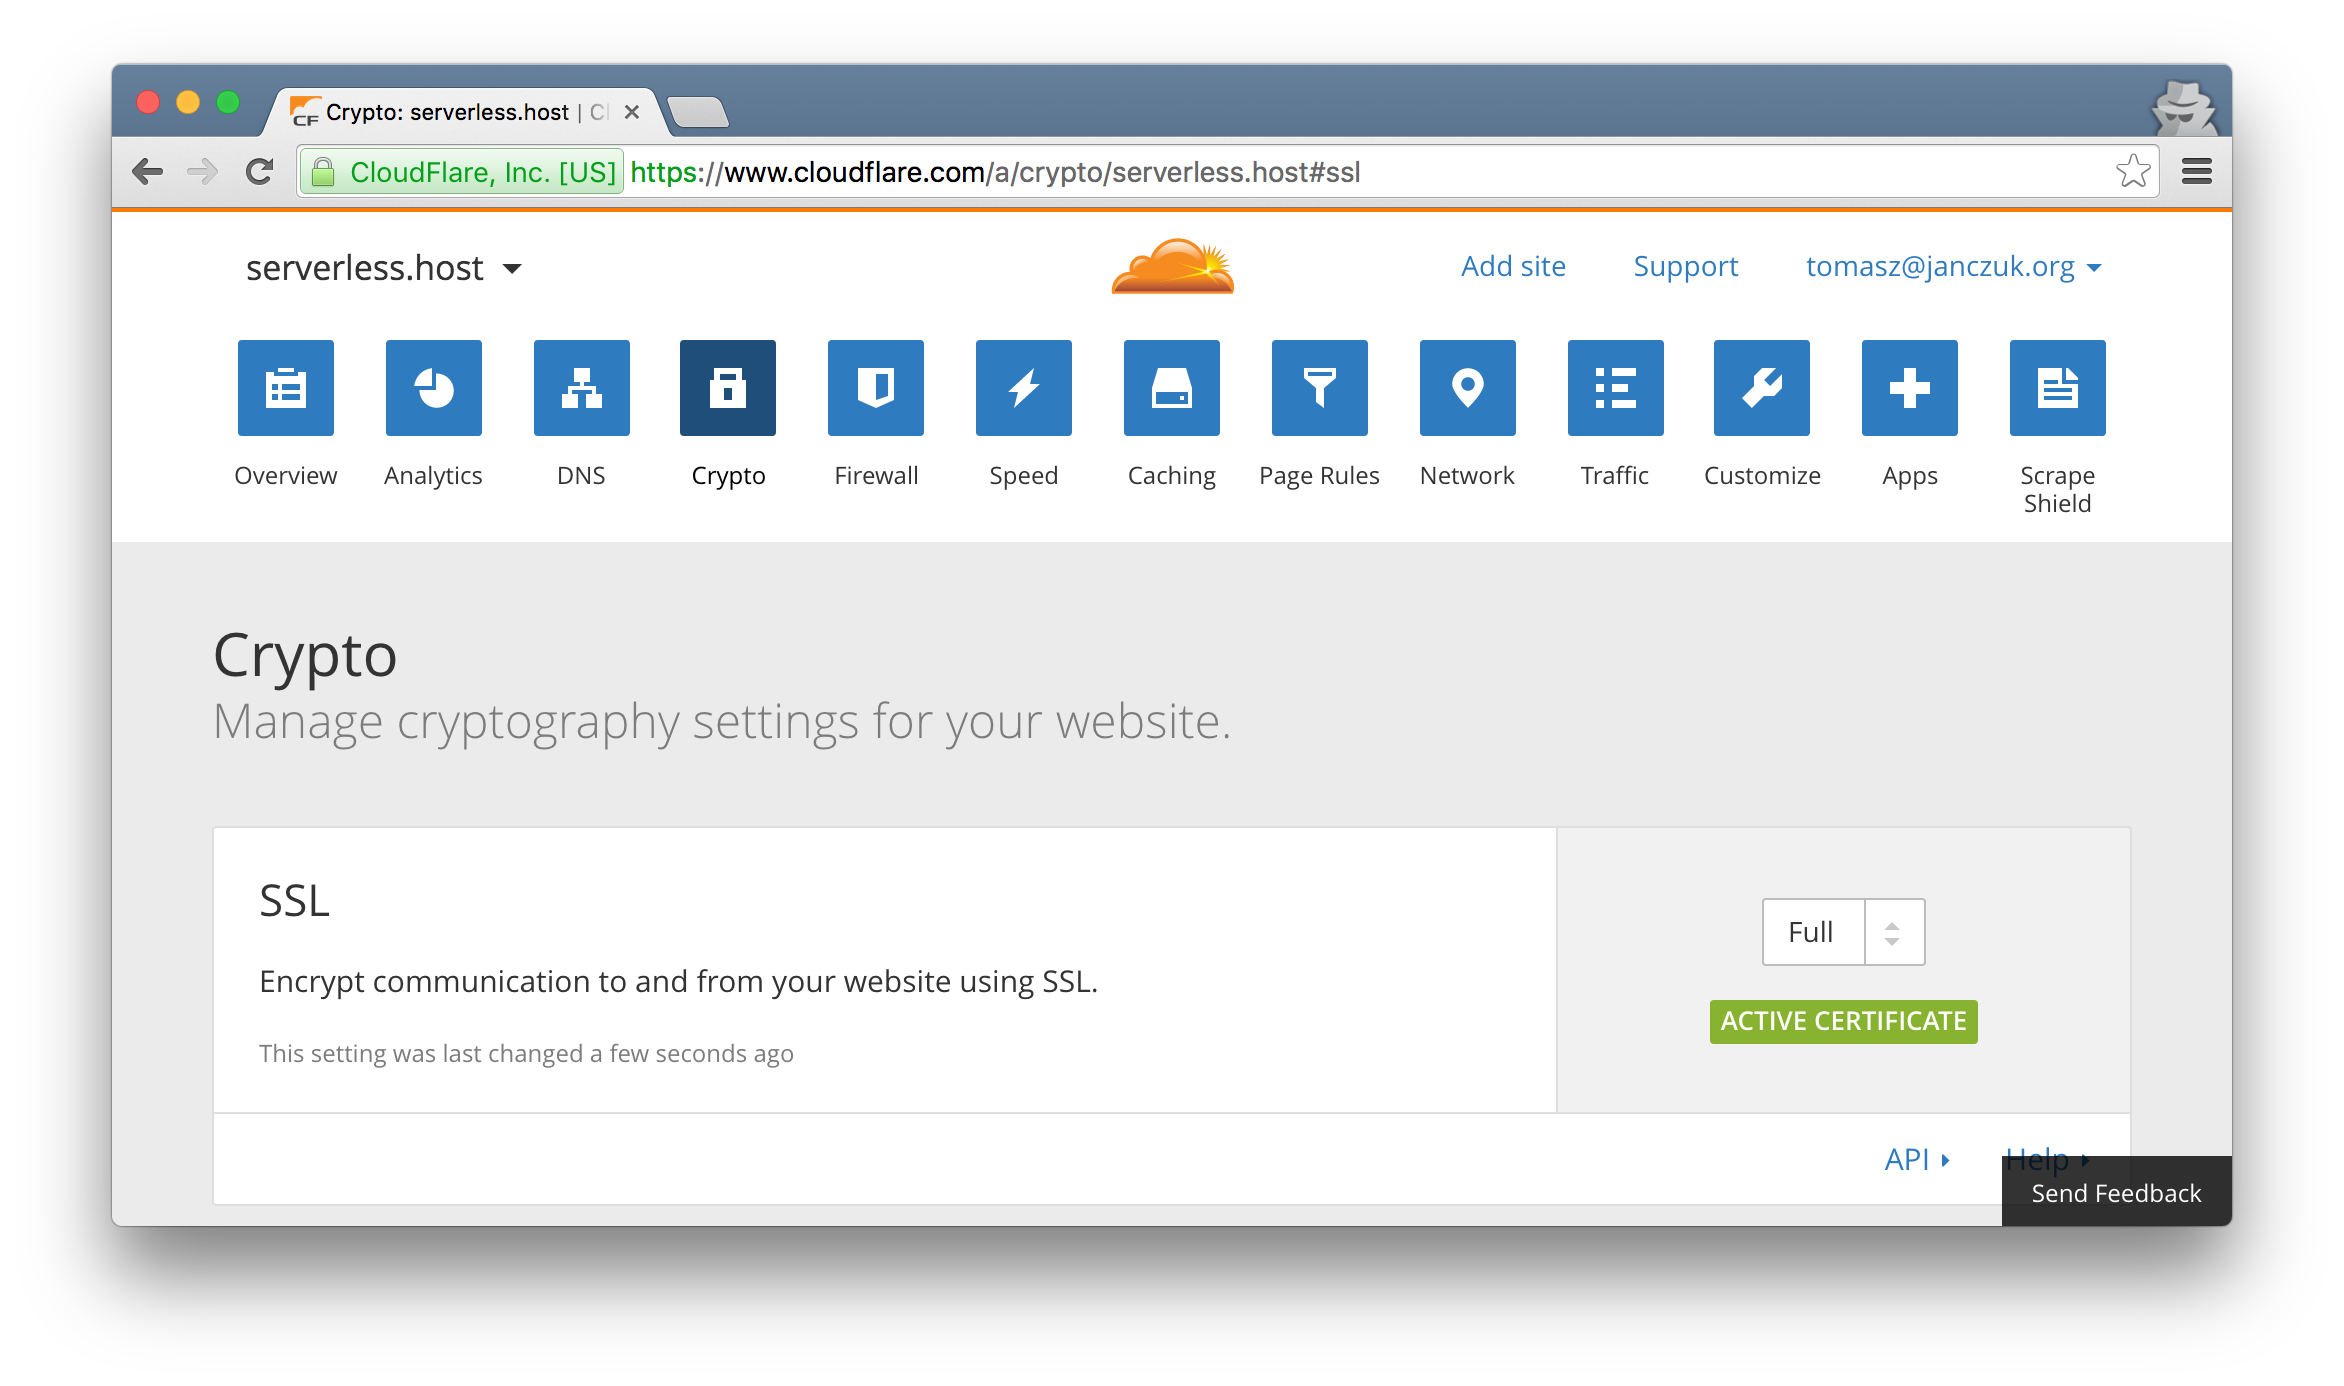
5. Ensure Full SSL mode is selected
Back in the CloudFlare dashboard, make sure your new custom domain SSL settings are configured with Full SSL mode. This means that SSL is applied all the way from the caller, to CloudFlare, to Auth0 Webtasks:
6. Voila!
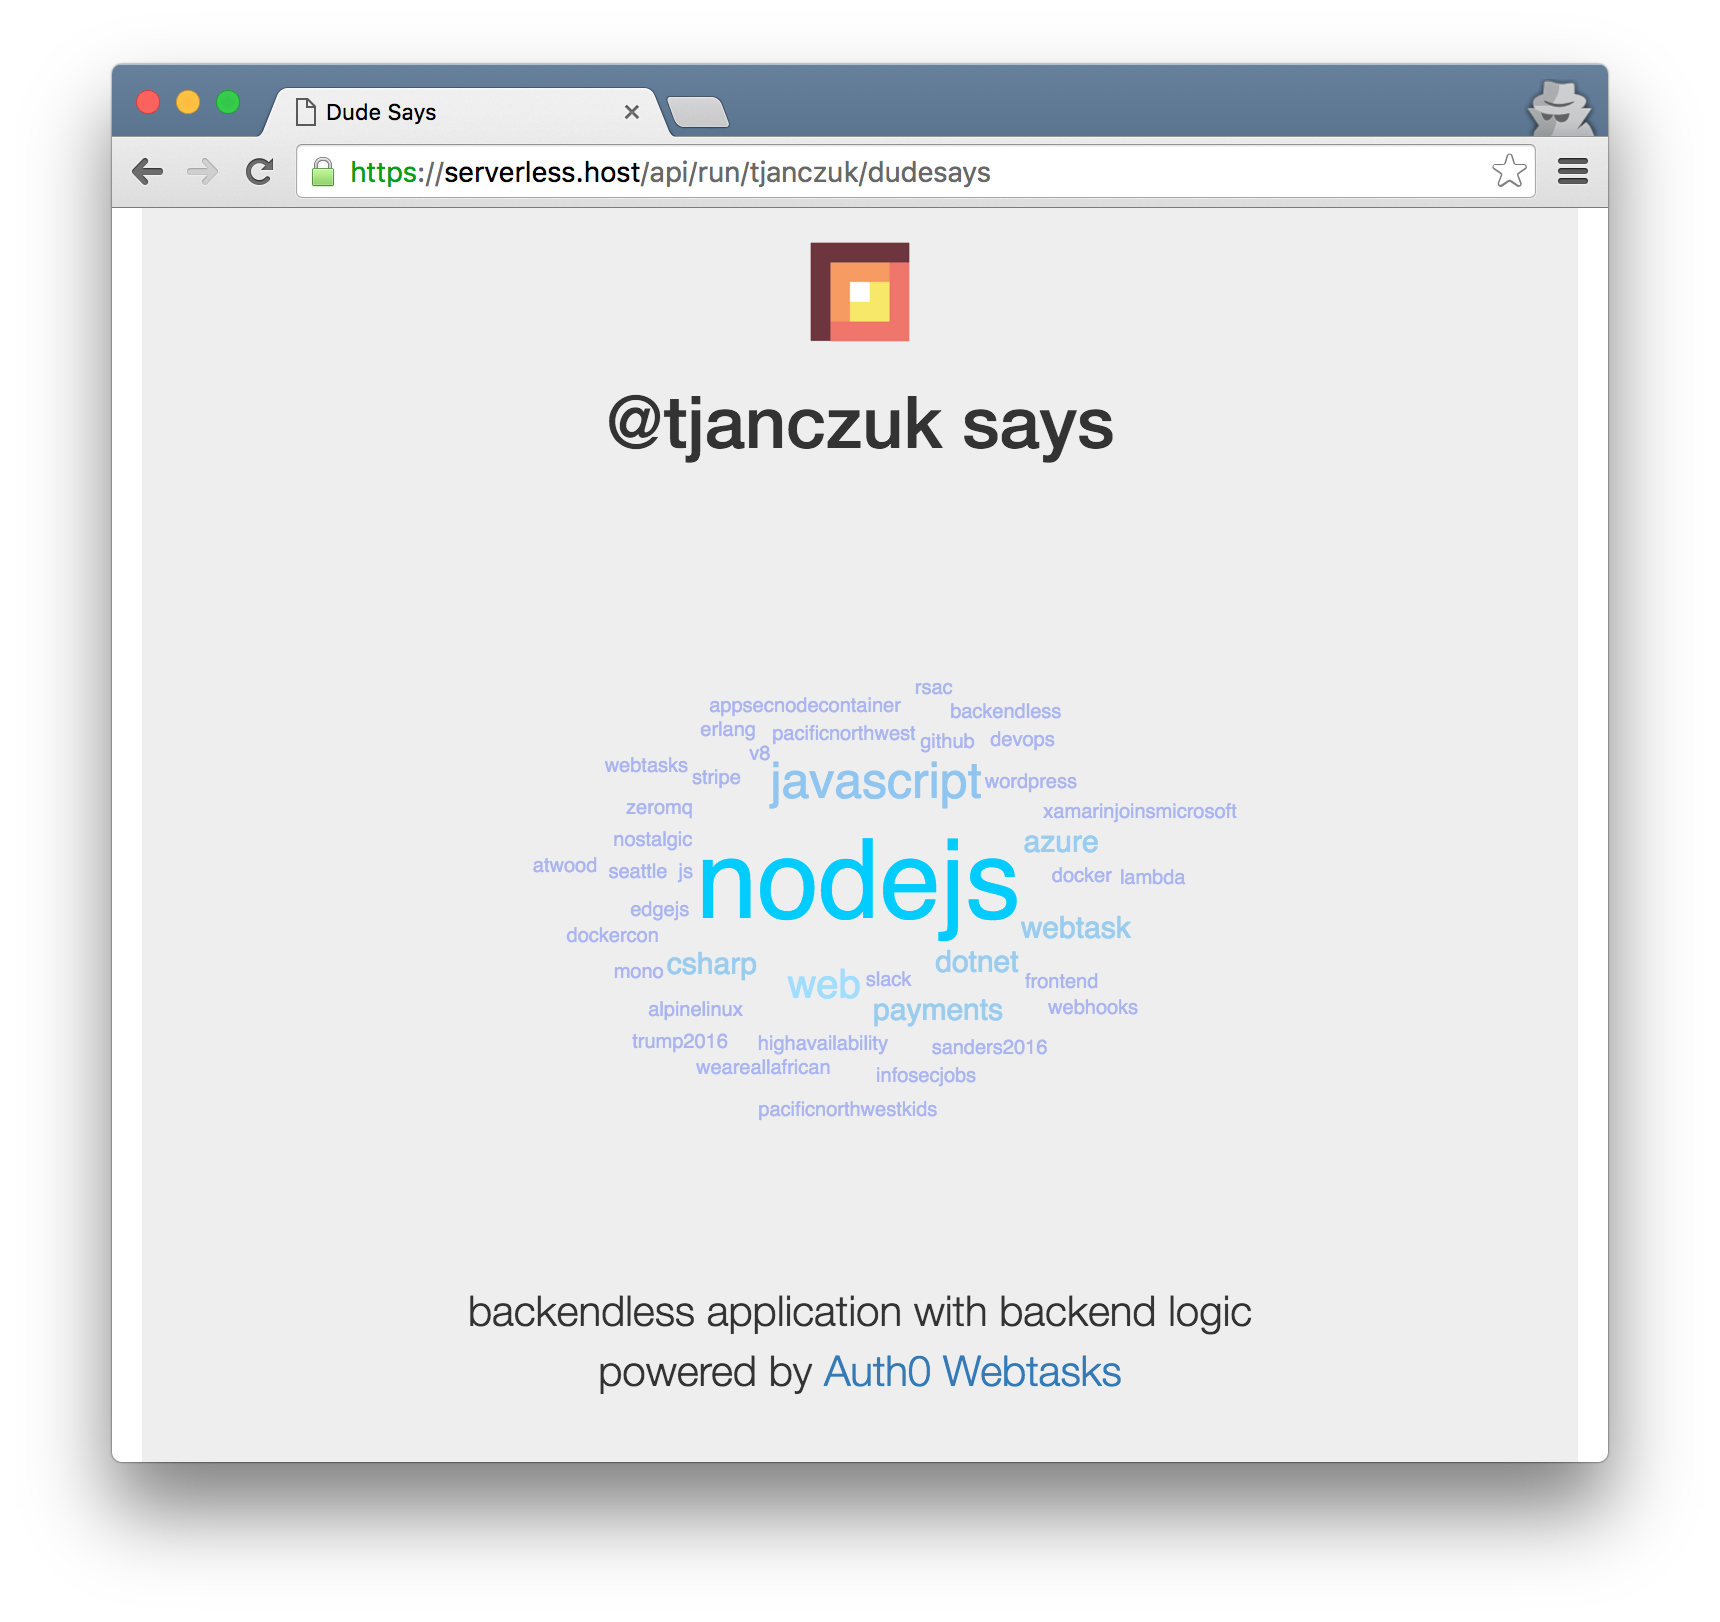
Congratulations, you have just set up custom domain access with SSL to Auth0 Webtasks. You can now access any previously created webtasks using the custom domain name and a simplified URL path, e.g. https://serverless.host/tjanczuk/dudesays. Note how the /api/run part of the URL is now absent. Given that, you can only execute created webtasks using the custom domain name. Webtask management HTTP APIs must be invoked using the shared webtask domain name, e.g. https://webtask.it.auth0.com/api/.
For example, a webtask you were previously able to access at https://tjanczuk.sandbox.auth0-extend.com/coffee4tomek you can now call using https://serverless.host/tjanczuk/dudesays:
Enjoy!